
I’m so glad you all enjoyed my friend Colleen’s beautiful bathroom renovation, and I know you’re waiting to see the kitchen remodel. It’s a good one, so grab your cup of coffee and cozy up for some kitchen goodness. What I love even more about this remodel is that she essentially worked with the existing footprint, while making it beautiful and functional. Not always an easy task, when you’re dealing with a home built in the 1950’s, when “open concept” wasn’t a thing.
And a peek at it now, in all its glory.
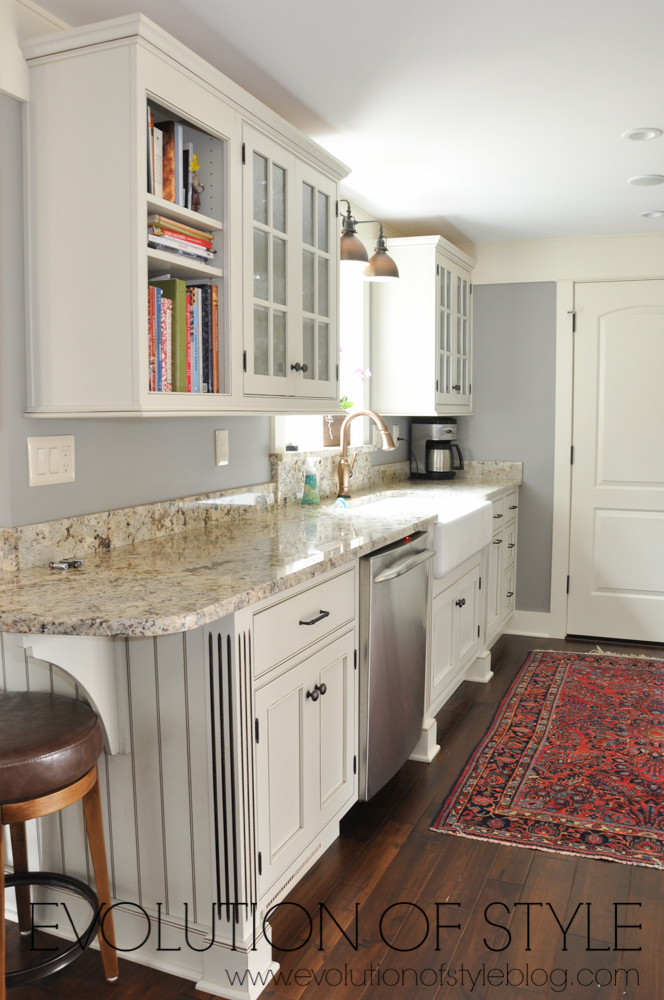
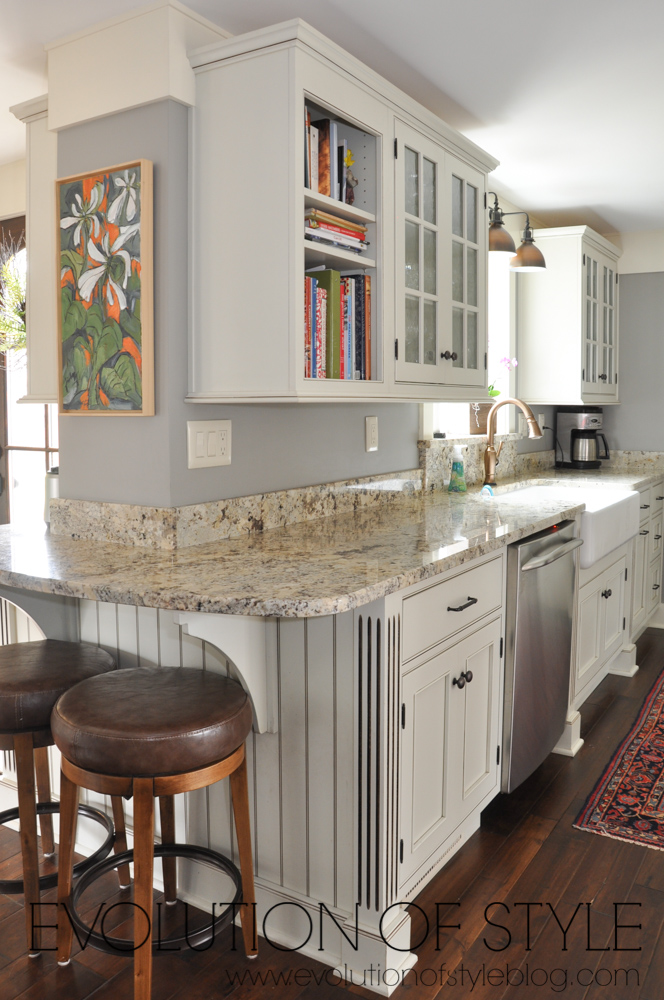
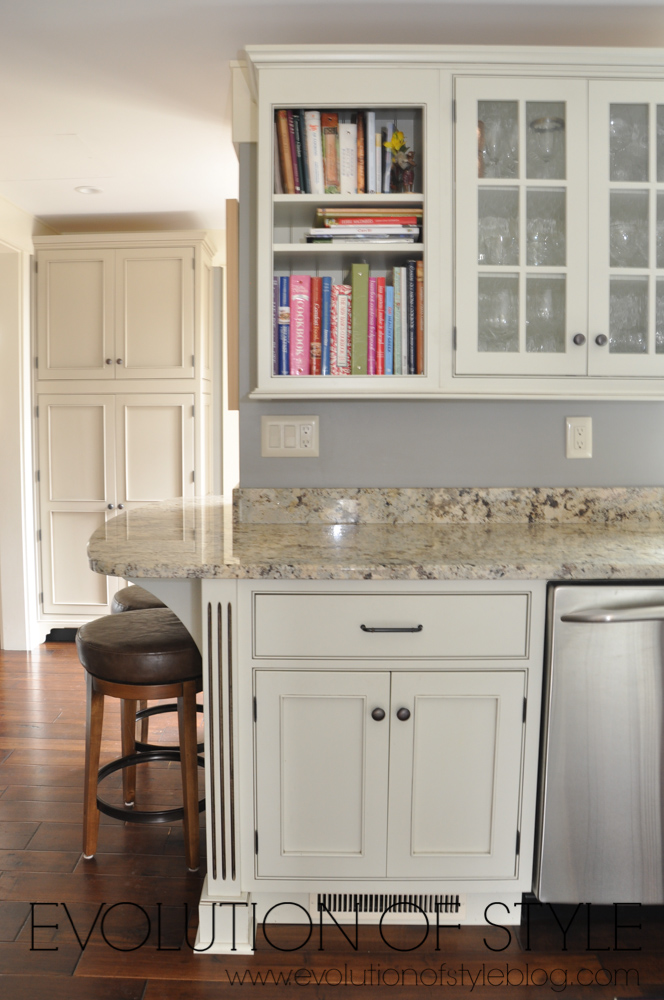
Notice again, that the basic footprint is the same! But all of the details – the molding, the fixtures, the seeded glass front cabinets – it adds to the “Wow” factor, and takes the whole space up a few notches. I love that Colleen was able to create such a high end look without taking down walls and starting from scratch.
You can see that there was an adjustment to this wall to make the kitchen more workable, and because it just makes sense. Although if memory serves, I think there was a legitimate reason that this wall was there – ductwork or HVAC maybe?
Amazing how such little changes can make such a big difference, isn’t it? In our second house, we took out a pony wall, and I was blown away at what a difference it made!
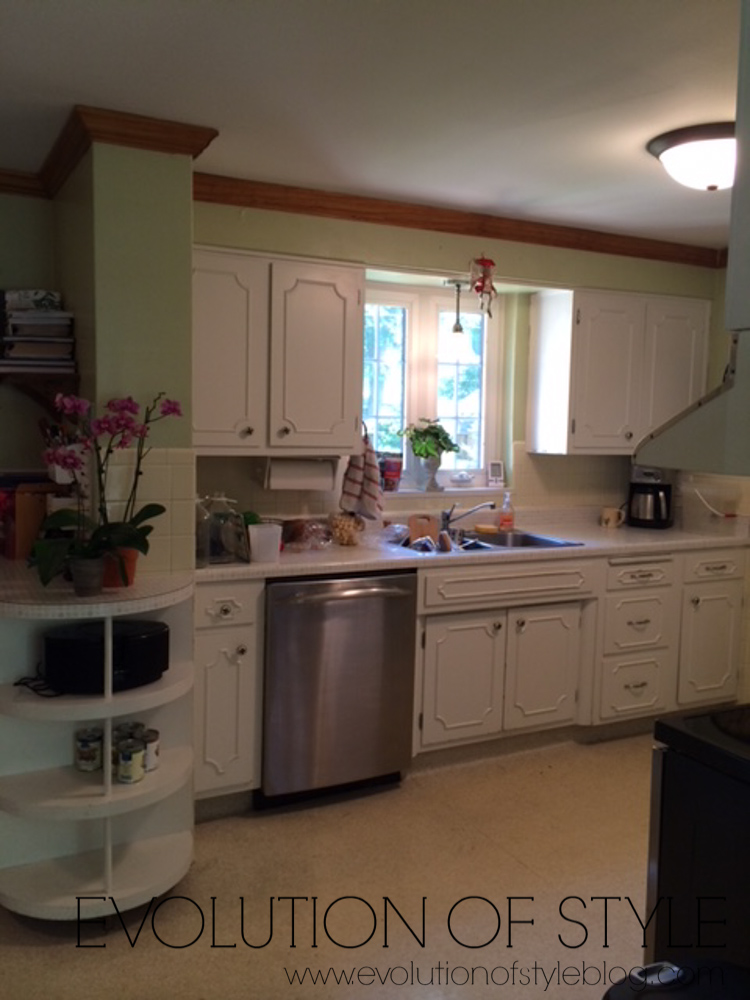
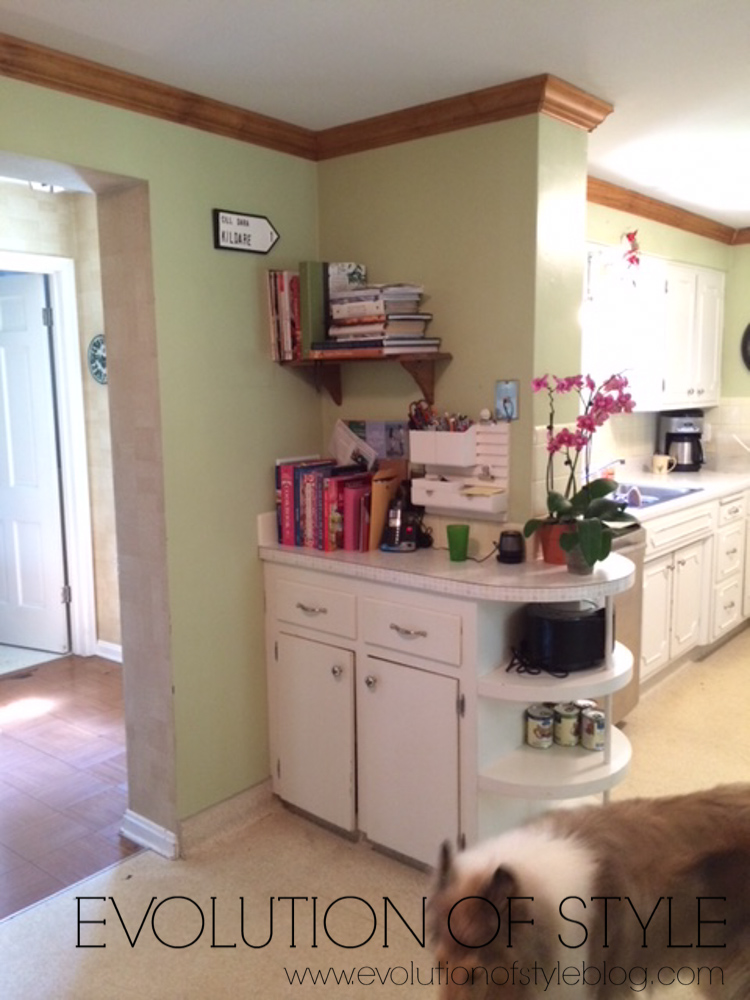
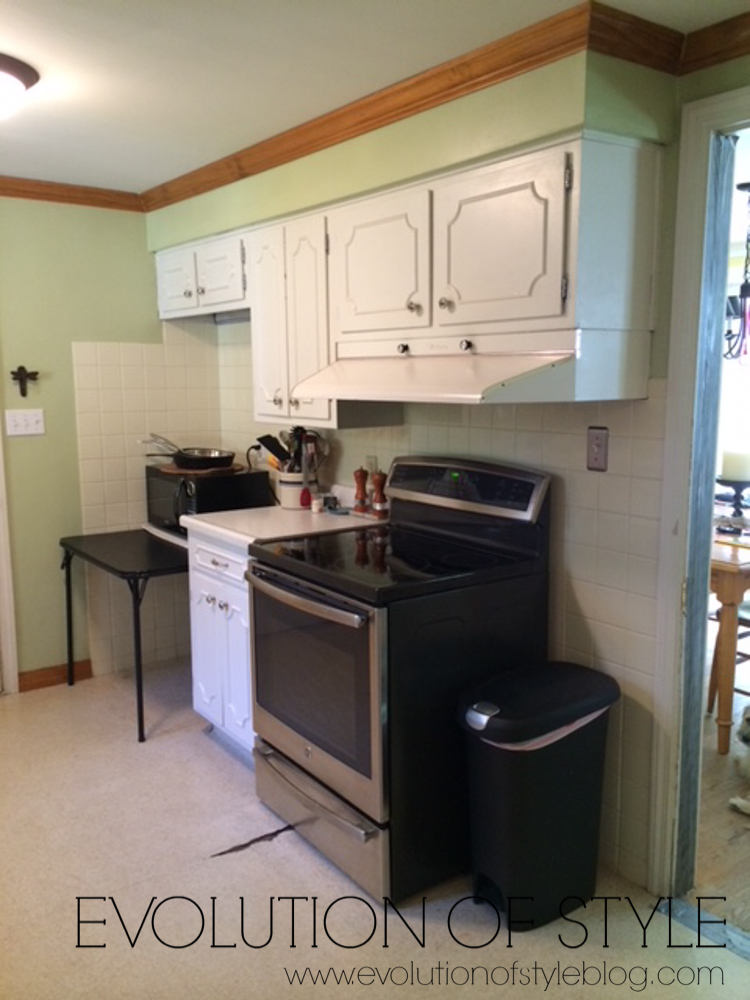
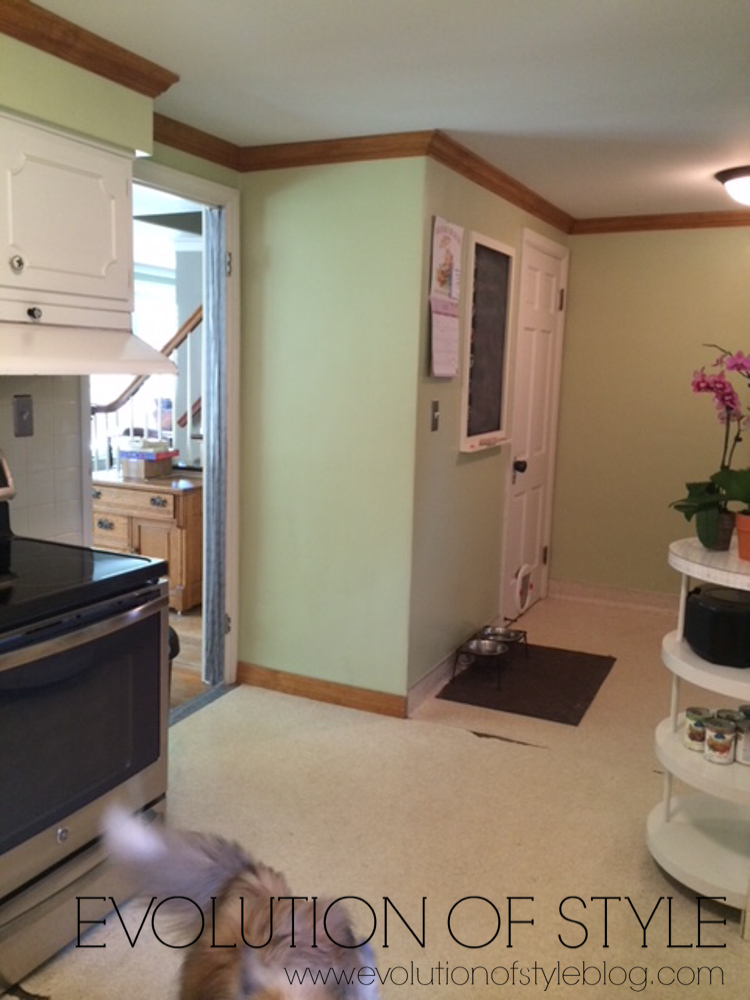
Now let’s take a look at the wall opposite of the window wall. Here it is before the remodel. The before photos don’t get much better than this, do they? Thank you Colleen for your blogger-like thinking on this project!
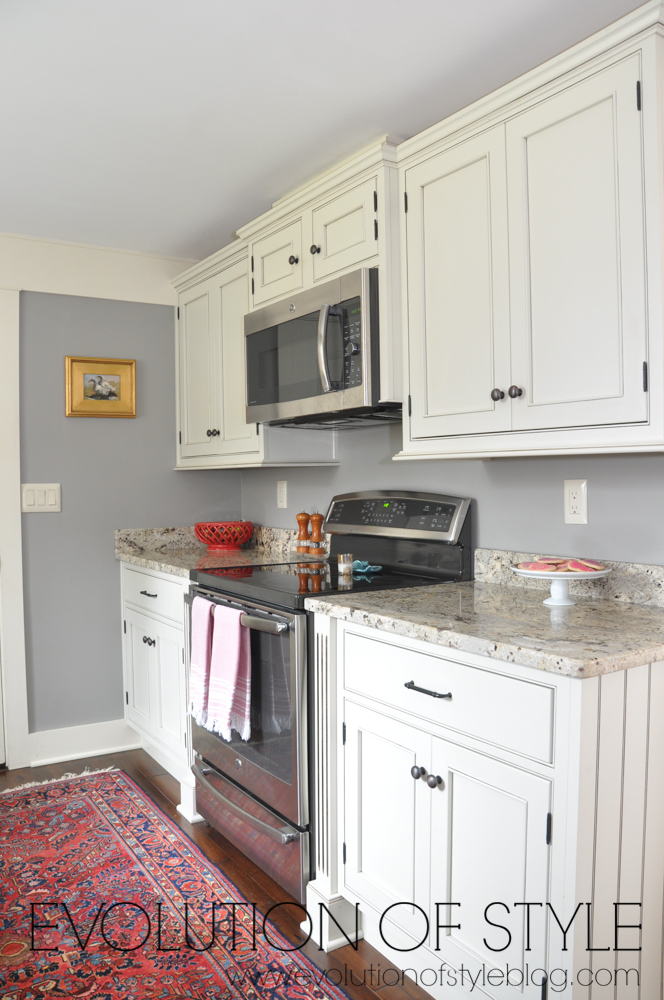
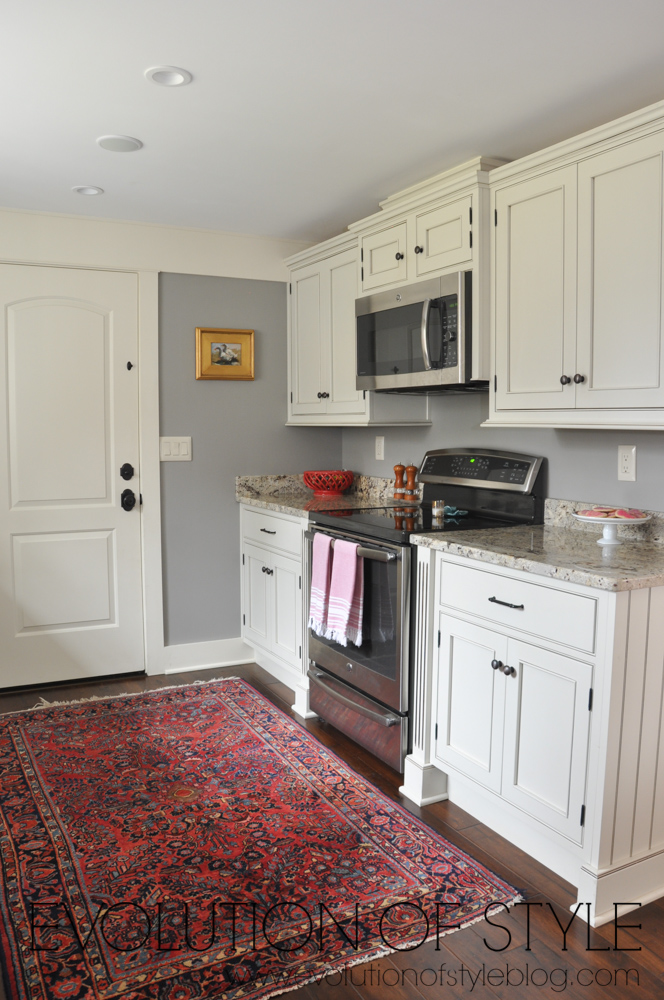
I told you it was good, didn’t I?
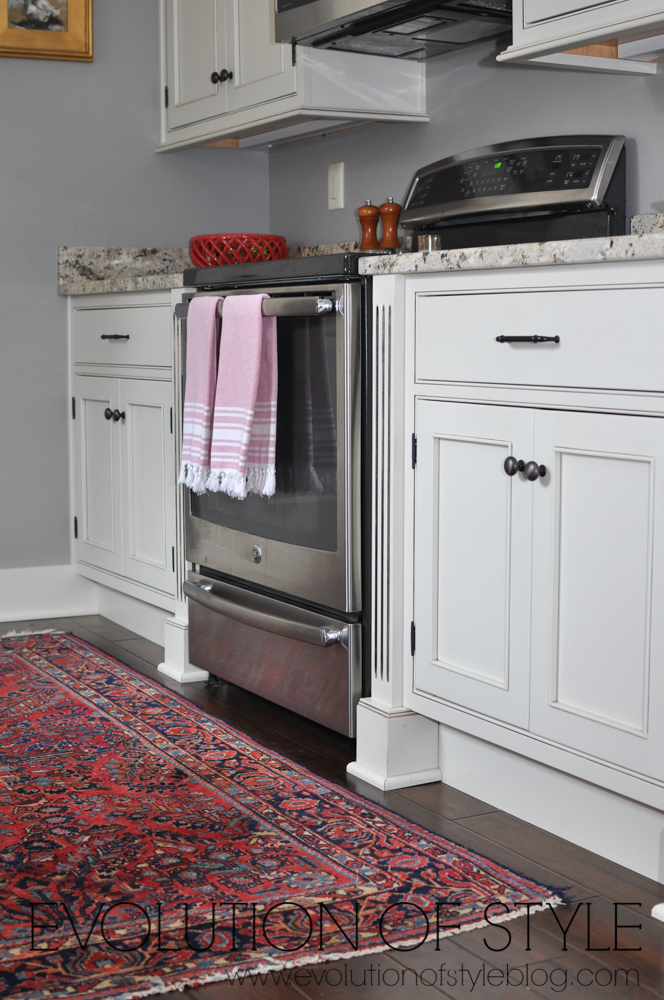
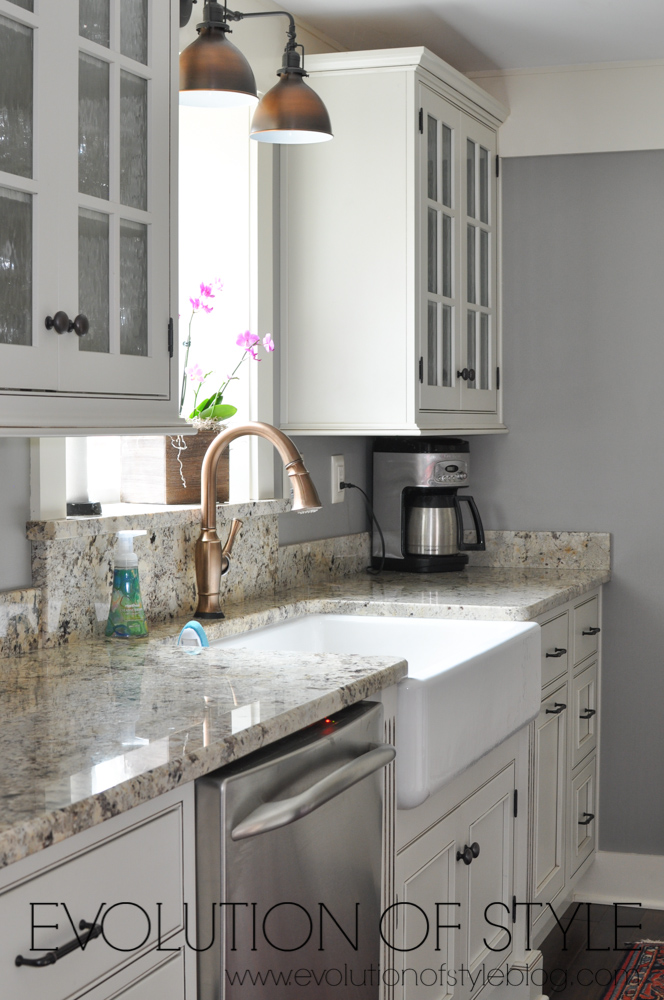
Again with the beautiful details!
But the original footprint remains.
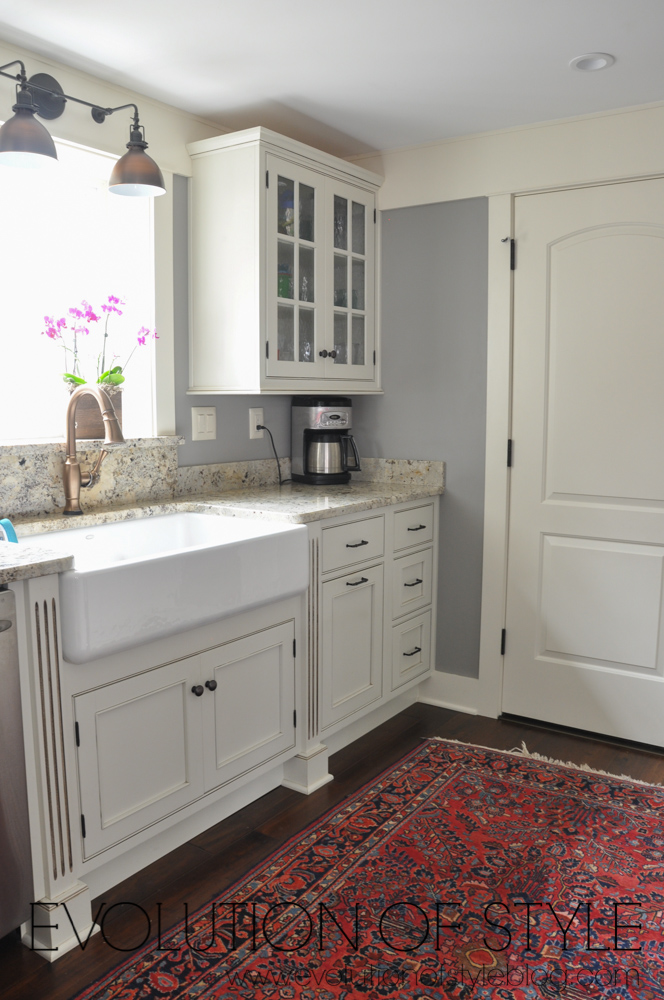
And now a new angle – as if you’re near the sink.
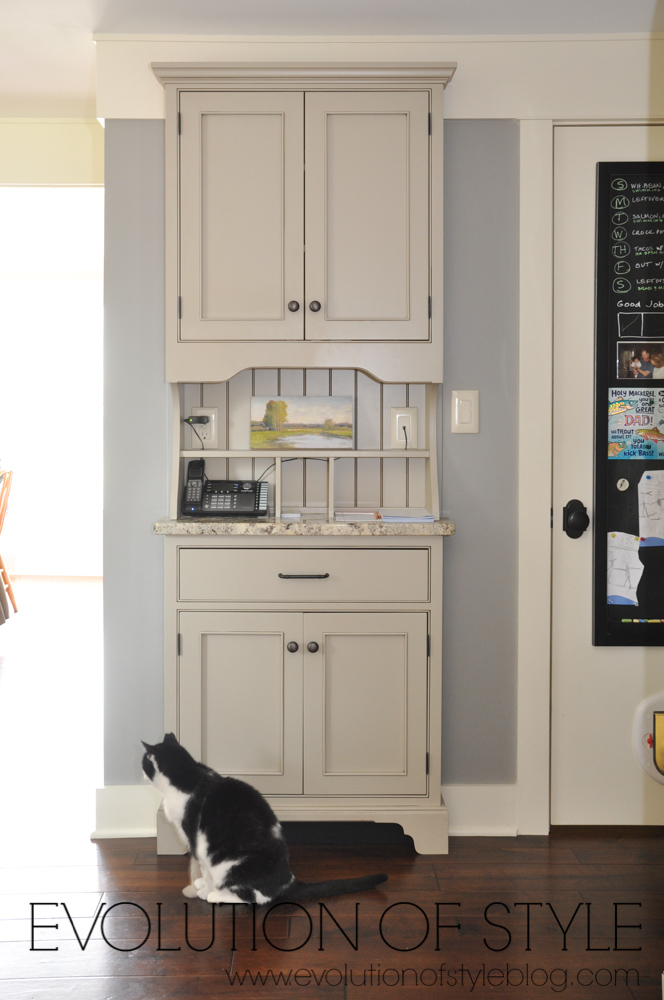
Isn’t this a great little nook that makes use of space that was previously unused and wasted? I love the color of these cabinets too. So pretty. And who doesn’t love a cute chalkboard in a kitchen?
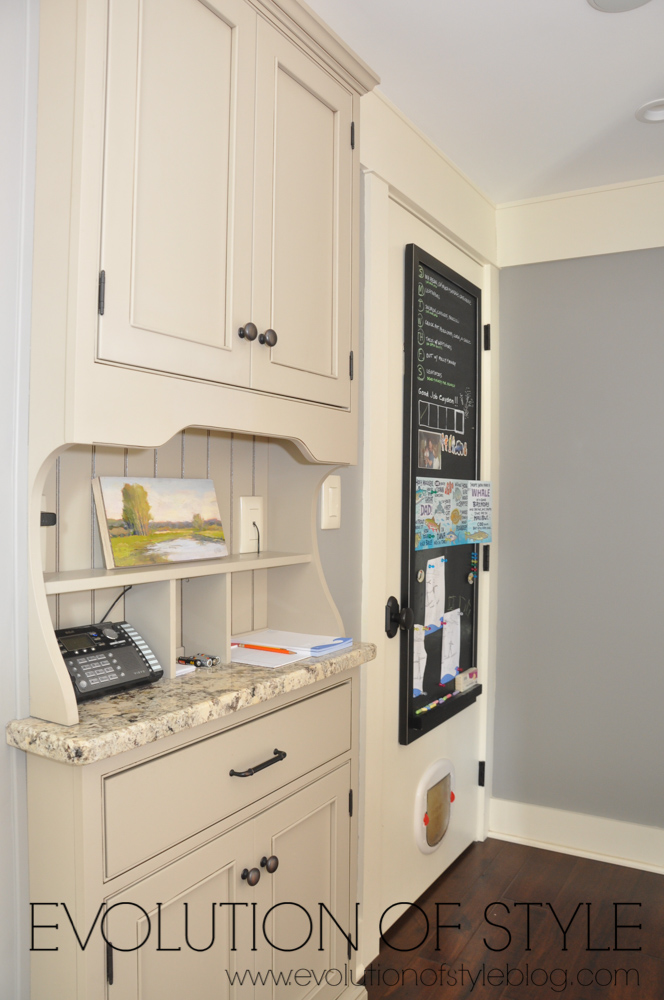
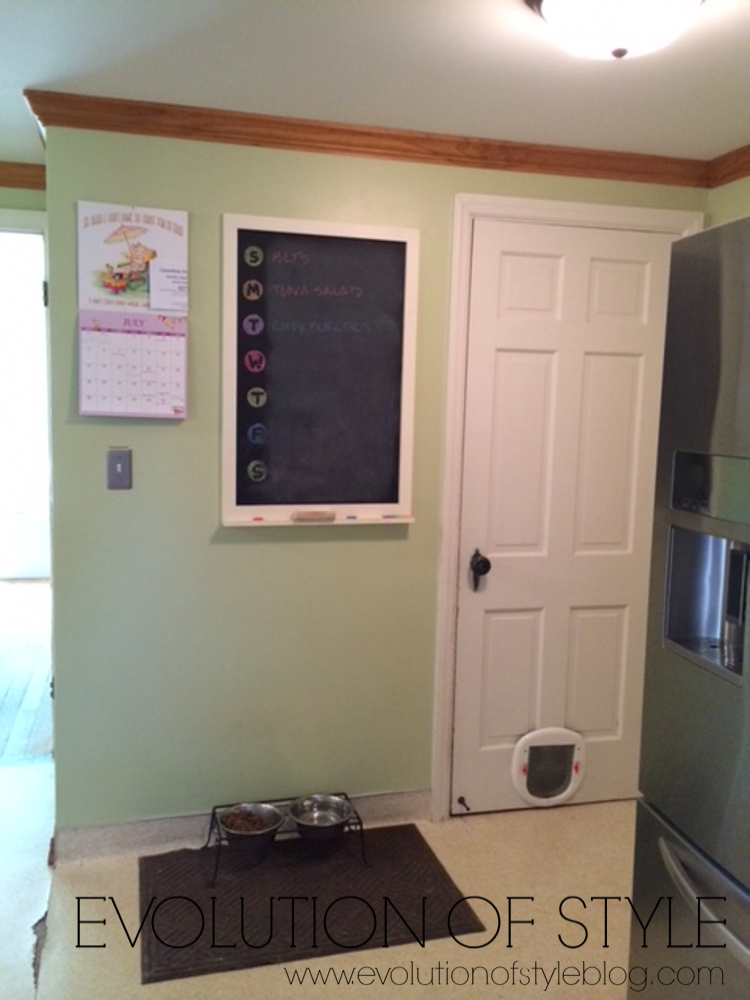
Here’s another before and after look at this functional little nook.
It’s cracking me up looking at these photos with the cat in them, but refusing to look at the camera. Cats are such divas, aren’t they?
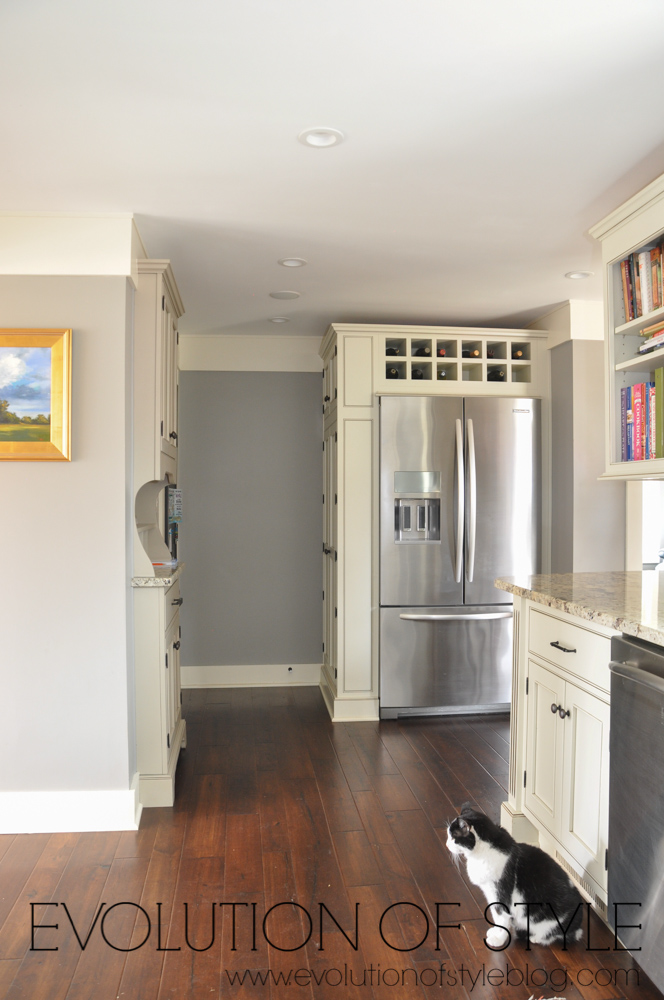
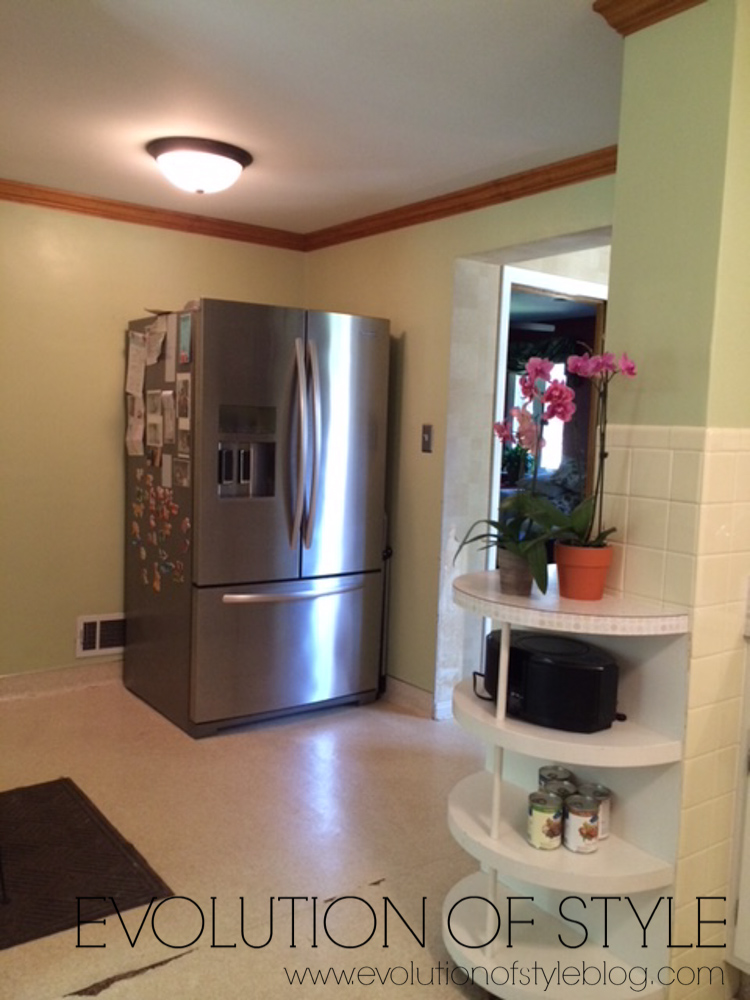
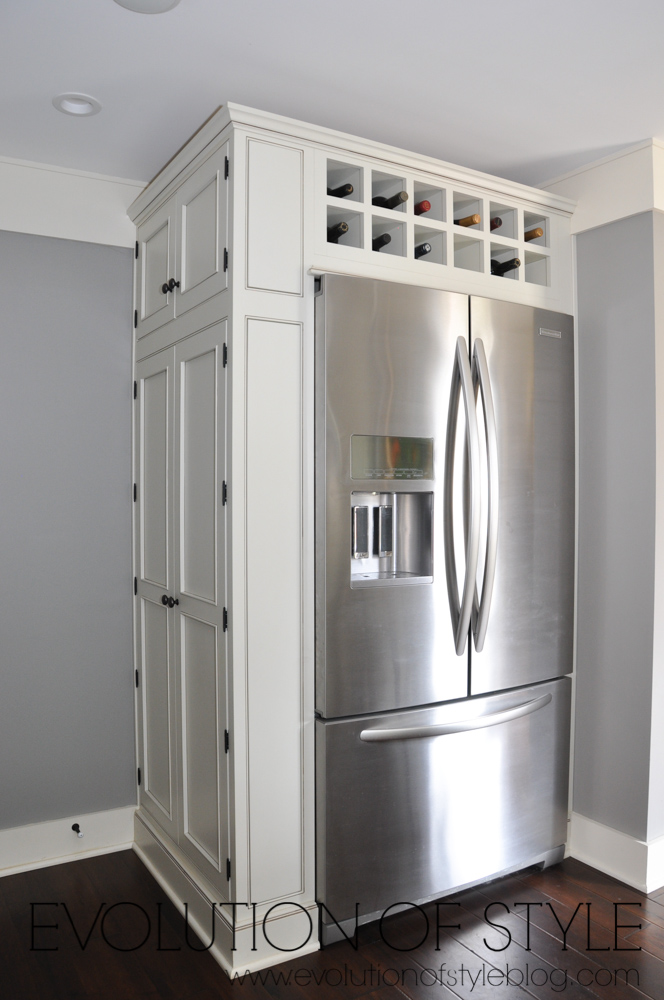
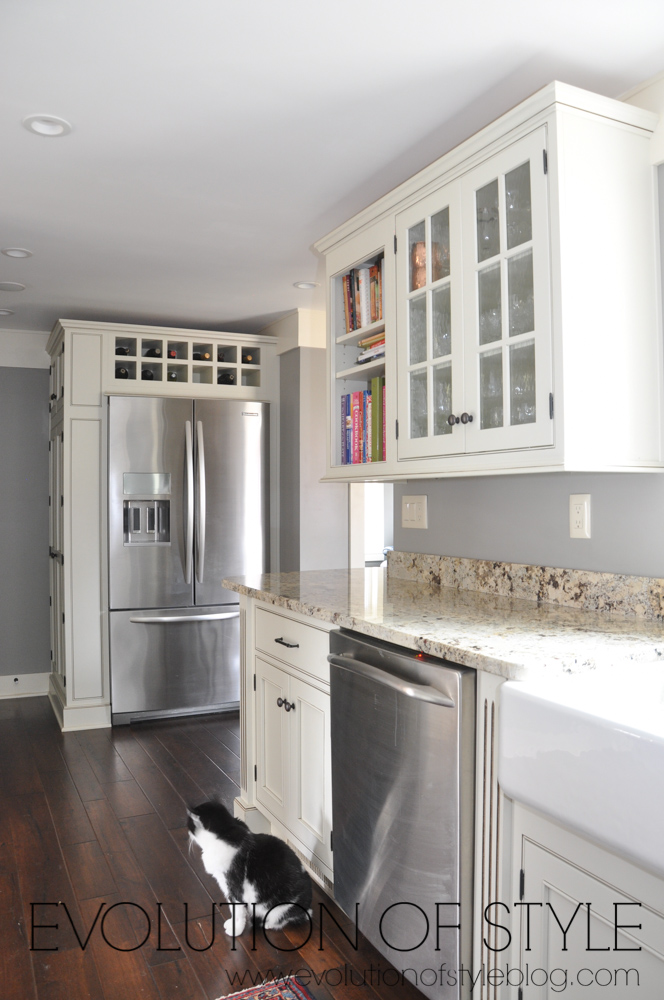
Before, the fridge was like the homely girl at the dance – hidden away in the corner, looking lonely and sad.
Now she’s had a complete makeover and is all dressed up for the dance, with wine at the ready! My kind of girl. I love the look of an enclosed fridge – it just really adds to the custom factor for me.
Again, the cat. I swear, it’s a real cat. You guys might start thinking it’s a stuffed, prop-cat or something with the same pose in every photo.
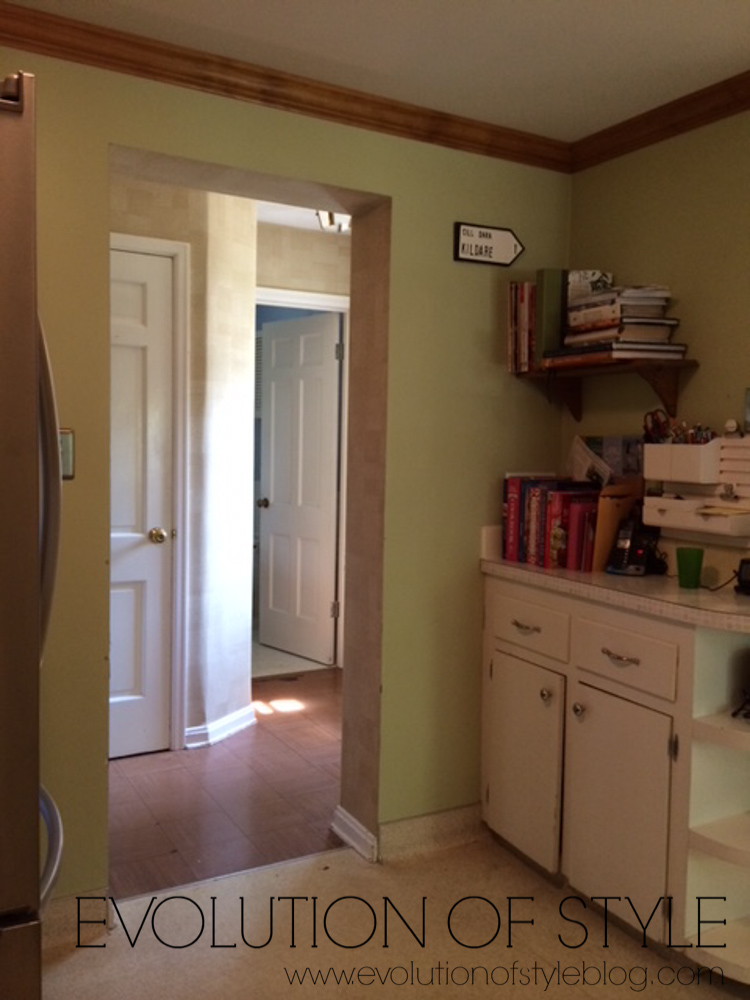
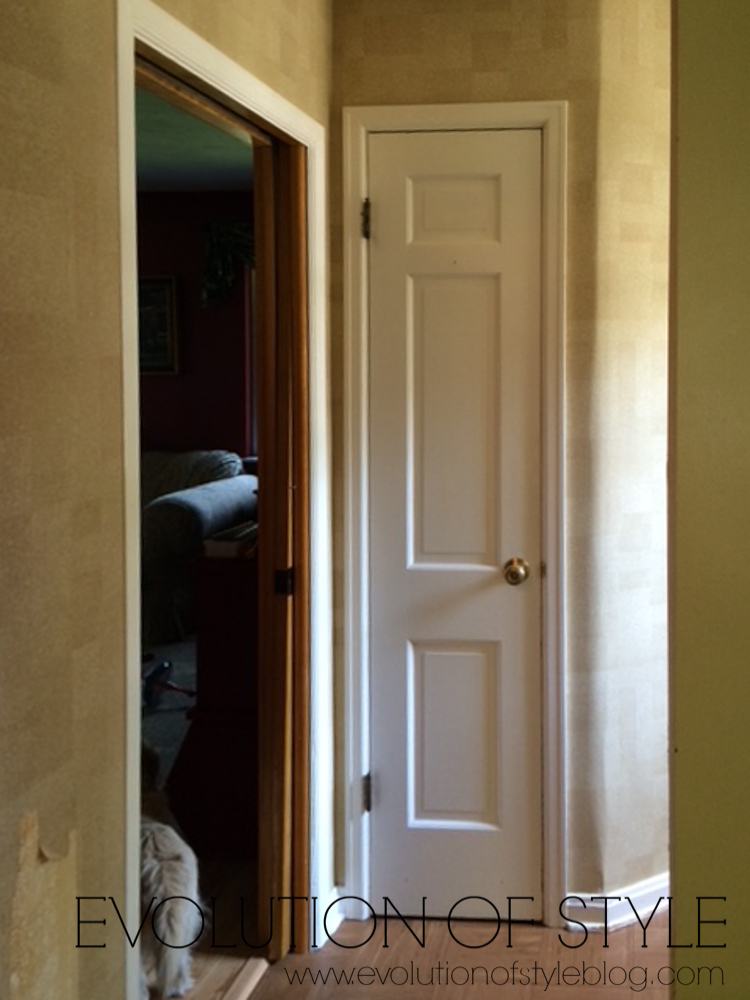
And here is the before photo of the area from the kitchen that leads back to the bathroom.
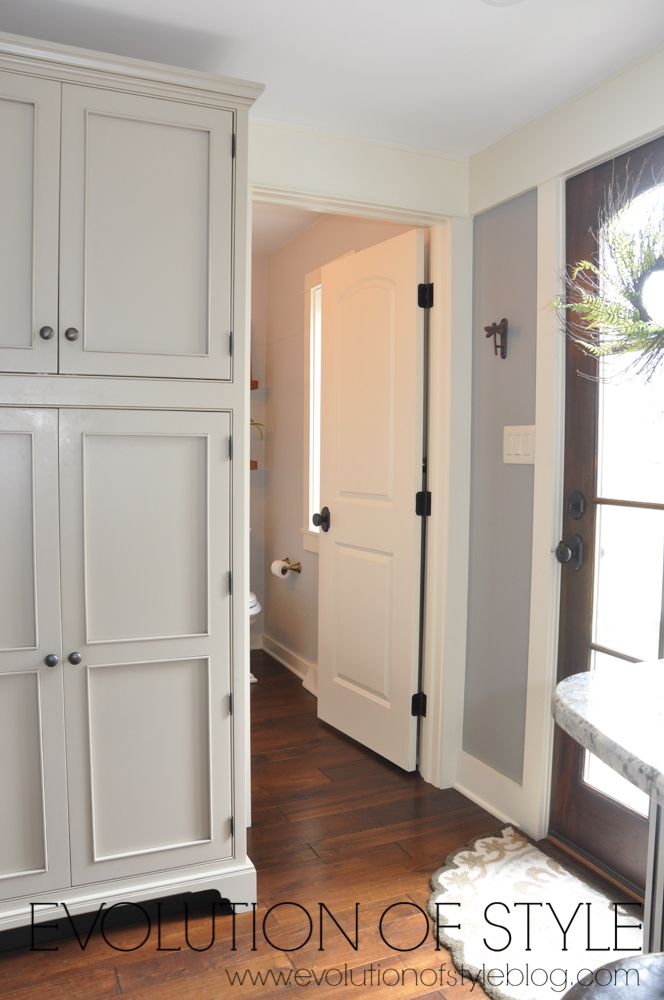
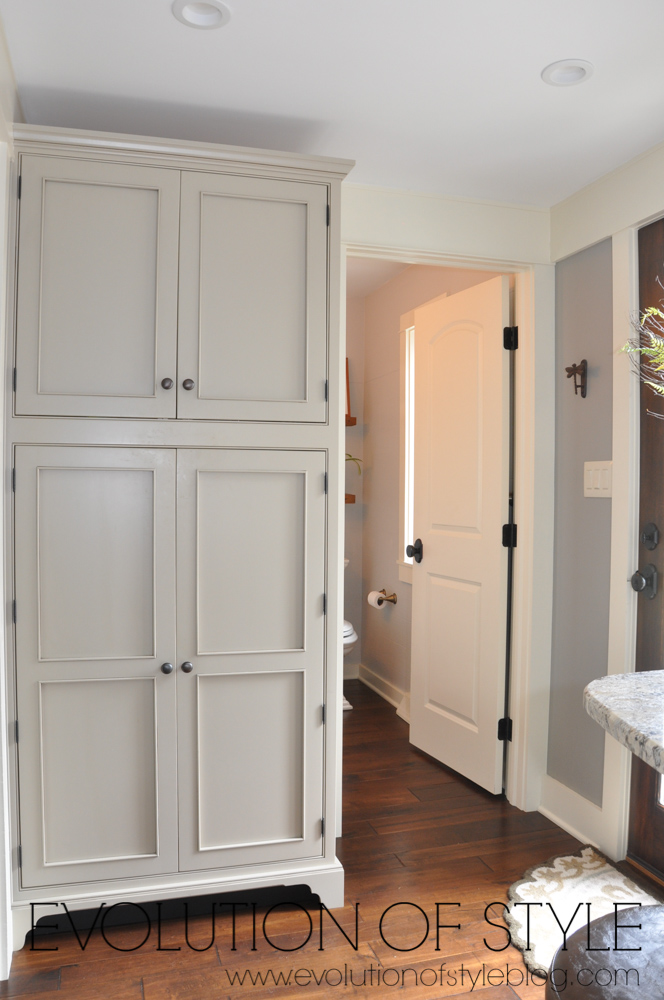
With that wall opened up just enough, we now have this gorgeous cabinet that looks like it was made to be here from the beginning. Cutting back the wall and adding a full glass paned door really brings in some more natural light too, doesn’t it?
You can see how the space leading outside looked before the remodel – the glass paned door that’s in place now is just a great addition!
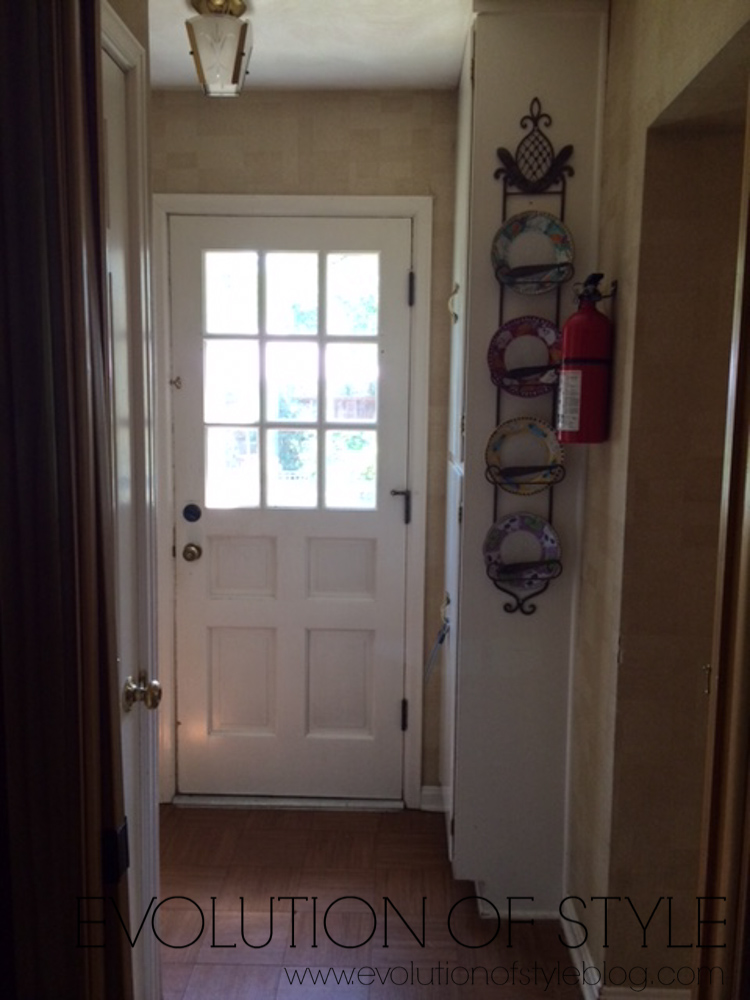
It just felt dark going back here with the previous layout.
Lighting is from Restoration Hardware.
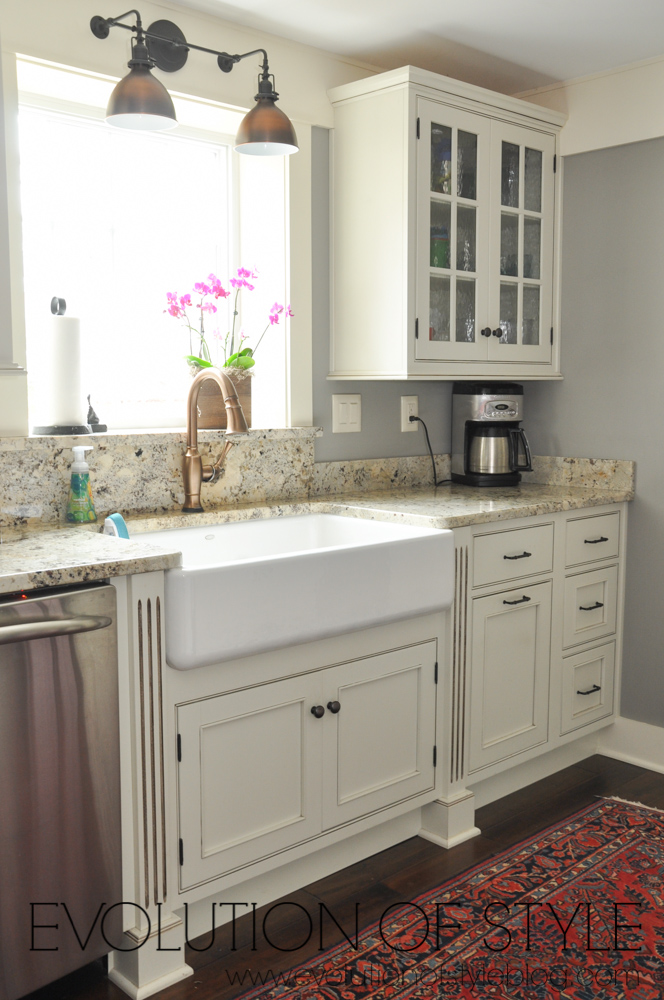
Wall color is a custom color tweaked from French Gray and Light French Gray.
Thanks again Colleen for opening your home and allowing me to share it with the world!
Jenny

15 Comments
Lisa
February 1, 2018 at 10:43 amSuch a clever use of space all over this kitchen! I love that slim nook that totally optimizes that wall, and how the counter is extended to accommodate a couple of barstools on the end! So smart and pretty too!
Patricia
February 1, 2018 at 1:16 pmWhat a beautiful make over ! They really made great use of all the space – and everything looks so bright and open. Really lovely kitchen…..
Rosie
February 1, 2018 at 2:35 pmI kept flipping back and forth from before and after. Amazing the transformation. I love the color. Do you know the brand name? Thanks for sharing. Great job
Colleen
February 2, 2018 at 8:13 amHi Rosie. Like most of our house colors, it’s custom b/c we can never decide on a premixed color. Here’s the formula. It’s based on the paint can formula sticker: Sherwin-Williams Satin Interior Super Paint, B1/Black – 2 in OZ column, 11 in 32 column, R2/Maroon – 7 in 32 column, Y3/Deep Gold – 44 in 32 column, 1 in 64 column.
Colleen
February 2, 2018 at 8:15 amOh, and THANK YOU for the compliments!
Paula
February 1, 2018 at 7:39 pmBeautiful transformation….thanks for sharing!
Debbie B.
February 1, 2018 at 8:10 pmI have flipped back and forth between the before and after pics. Maybe I have missed something in this lovely remodel. I am confused about what might have taken place with the cabinet doors. Noticed the after pics show hinges so I am assuming the original doors were preserved??? If so how was the mounding changed out? If new doors were installed I am curious why hidden hinges were not used?
Jenny
February 4, 2018 at 10:45 pmCompletely new cabinets – new everything!
Shannon
February 2, 2018 at 10:01 pmWhere did the lights over the sink come from? Love them and the whole kitchen transformation.
Jenny
February 3, 2018 at 6:05 pmThe lights are from Restoration Hardware.
Rebecca
February 4, 2018 at 7:24 amSuch a stunning transformation! The combination of paint color, cabinet finish and granite is beautiful and the details with glass doors, lighting and faucet are lovely together. I am just starting a kitchen renovation and would love to know which granite was used.
Jenny
February 4, 2018 at 10:44 pmColleen said it’s called Alaskan White – but bear in mind that these names seem to be somewhat arbitrary, and that different slabs may have the same name, but look a lot different from one another.
Christine
February 8, 2018 at 12:43 pmThis is amazing! I love all the details!
chevelle
January 3, 2020 at 6:52 pmI just came across this and was wondering about the cabinets were they custom made?
Jenny
January 7, 2020 at 7:21 pmSorry – I don’t have that information.