Hello!
Since I’m a glutton for punishment and must secretly thrive on chaos, why not add another project to the mix? For the longest time, I have wanted to stain our double front doors in a richer color. I have ogled front doors like this stunner – what’s not to like?
And this:
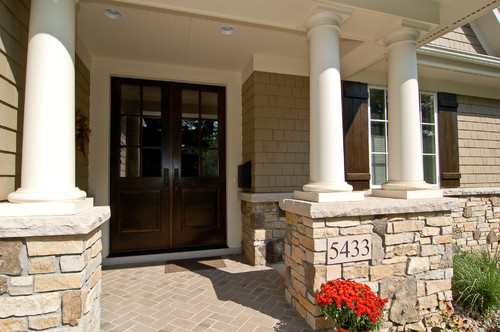
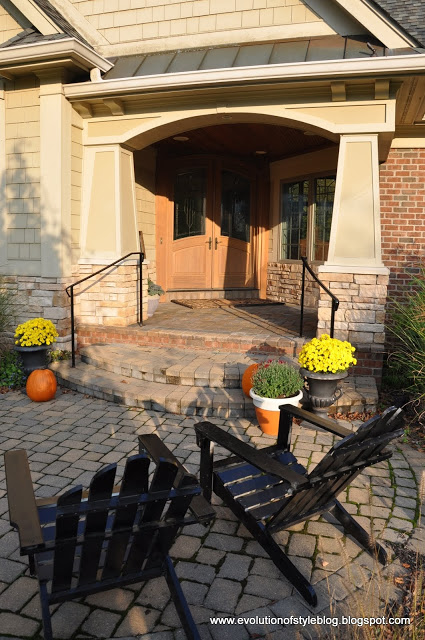
Or this:
One more – bear with me on the front door crushes I’m having:
All gorgeous, right?
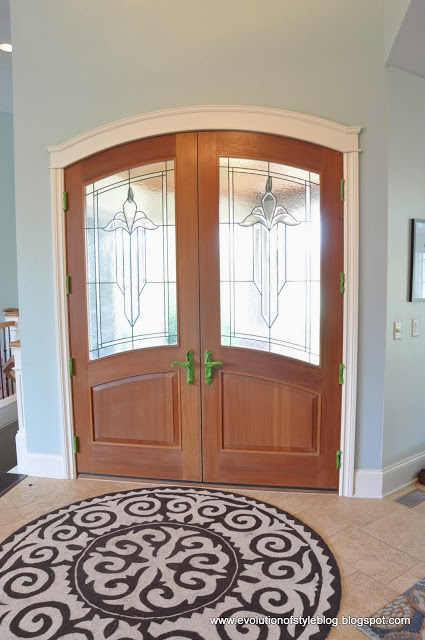
However, the thought of stripping my front doors was daunting, and not something I was looking forward to tackling. You can see in this photo that the exterior side of the front doors are looking a bit faded.
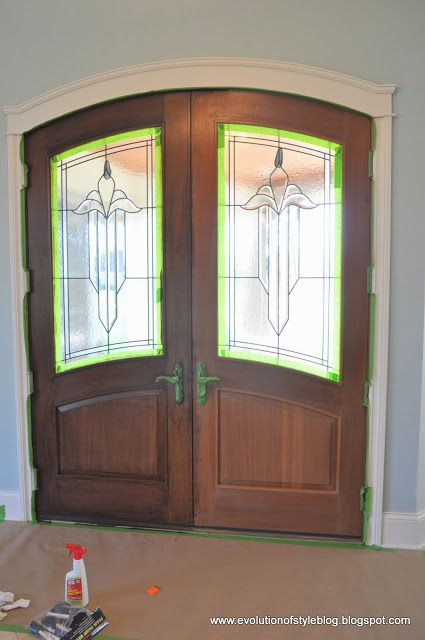
Inside isn’t quite as faded, but still isn’t as dark as I would like.
So, you can see that they’re taped off and ready for action, but yet, they’re not sanded down to the bare wood. You’re probably thinking, “What is she doing? How can you possibly stain a front door without sanding off the old stain?”
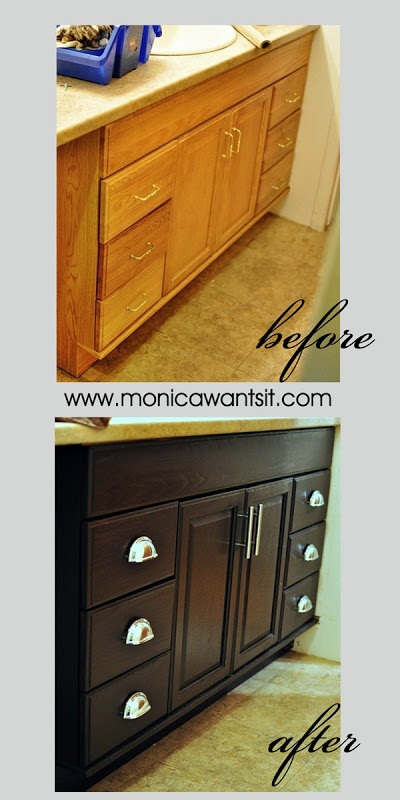
After stumbling upon Monica’s amazing
oak to espresso bathroom vanity makeover, I was obsessed. Seriously, I don’t even remember how I found her blog and this project. I think I was reading a
Houzz article and one thing led to another. I wasn’t even looking for it – I like to think it found me. 🙂
I was in awe of her transformation.
Amazing, right? And she did this without sanding off the original honey oak finish.
“Impossible!” I thought. I had to read her
FAQ more than once to believe it myself. But, it’s true.
So, I hustled out around town in search of this miracle product. It must be popular, because one shop told me that about 10 people had recently inquired about it, and another store even knew the color that I was looking for before I said a word. I think the jig is up and word is travelling fast.
I snapped up some of the stain, and got to work yesterday. Even with one coat, I’m loving the difference. The door on the left has been stained – sorry about the photo quality, I was trying to work quickly to maintain an even stain application, and was taking this picture with a sock full of stain on one hand. But, you get the idea.
So, I am going to get my beautifully dark front doors without the back breaking work of sanding off the old finish entirely. I’m really excited to get to the outside of the front doors since they are looking the most faded.
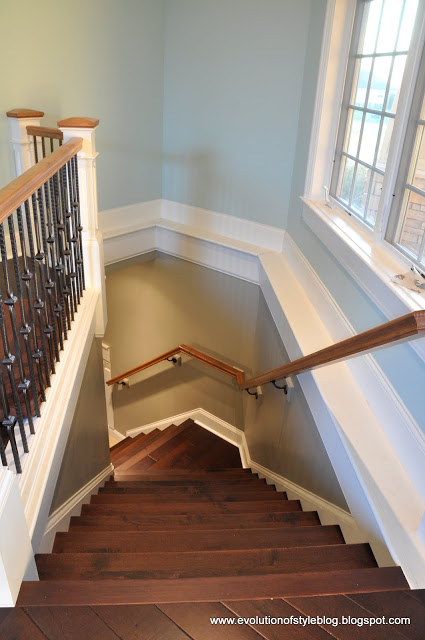
Of course, this also has my wheels turning on staining other areas… Like the banisters.
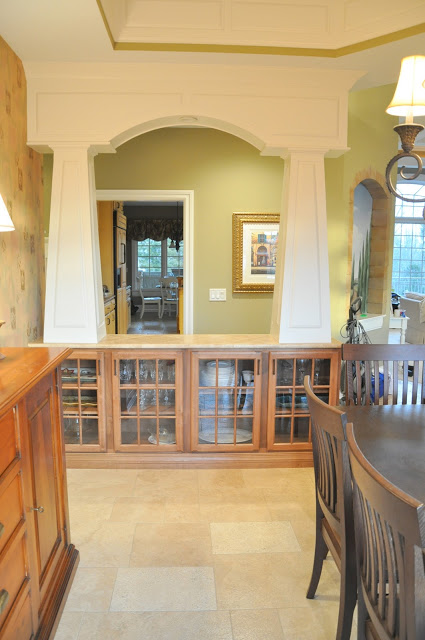
And the dining room built-ins (you can see the outside of them here).
Here’s an old photo of the opposite side of the built-ins, in the dining room.
Our kitchen breakfast bar is the same color, and it’s also on my list. So many possibilities!
So, have I just been under a rock and am behind the curve in discovering this gel stain? Have you used it? Or did you go the hard route and sand down a piece to the bare wood before refinishing?
Linking up:

Related
I’m Jenny, a wife of 28 years, mother of three, and a corporate drop-out. I’m a creative minded blogger, business owner and DIYer, and love transforming furniture, cabinets and rooms in my home. I’m a card carrying paint geek, and am always amazed at the power of paint in making budget-friendly updates to your home. I’m a serial house-stalker, and never tire of a great home tour or a before and after renovation. I’m a firm believer in restyling, refreshing and renewing things in your home to make it your own - without breaking the budget. I’ll show you how!




22 Comments
Andrea @ Decorating Cents
October 23, 2013 at 1:26 pmLove all your inspiration pics.
Maury @ Life on Mars
October 23, 2013 at 1:38 pmSo cool! Now you have my wheels turning about where I can use it in my house!
Laurie
October 23, 2013 at 1:56 pmLove it! The door looks great already. I have never heard of the product either, but so glad you shared it! Can't wait to see the doors finished!
BrianAngieMattTimMeredith
October 23, 2013 at 2:20 pmWell, I'm curious now and will wait w/anticipation to read what you think of the product. A year ago, I took down our banister, and began the task of removing the old stain. I started the sanding of it and the stair rails, got overwhelmed and bored w/the thought of the silly spindles…and quit. I really need to finish it; and this might inspire me. I was thinking I would just have to paint the pieces b/c I just cannot motivate myself to sand those tiny crevices of the spindles. Thank you for this post!
Cassie @ Primitive & Proper
October 23, 2013 at 6:19 pmoh so pretty!!! the doors are looking much more like a grand entry!
offpagentryplace
October 23, 2013 at 9:17 pmI have been debating this for our banister rails. How bad were the fumes? I was told to wait till the summer to vent the house out… but I'd love to do this sooner….
Jenny
October 23, 2013 at 9:48 pmThe fumes weren't bad at all. Honestly, I noticed the odor when I first opened the can, but after that, nothing noticeable at all.
Andrew's Reclaimed
October 24, 2013 at 12:40 amnever used it, but it looks a lot more straightforward than sanding away!
DeniseW
October 24, 2013 at 12:45 pmI stained my whole kitchen with the General Finishes Java, 3 coats of stain and 3 coats of top coat. It went from 1980s oak to modern kitchen. It's held up beautifully and it looks so modern and fresh. ood luck and I'm sure you will love the finished product!
Lisa @ Shine Your Light
October 24, 2013 at 5:05 pmSo glad you found a way to get the look you wanted, without all the hassle of stripping and restaining!
I have used Polyshades, similar in that it's color and urethane all in one, and don't love how it can chip and knick like paint, but I have heard that the General Finishes products are more durable. You'll have to update us about how it holds up. The color looks fabulous!
Monica @ MonicaWantsIt.com
October 28, 2013 at 1:41 pmThanks for featuring my tutorial! Staining my front door is actually next on my to-do list, so it's great to see how well my steps work on doors, too. This stuff is truly magical! 🙂 Have a great day, Jenny!
Kris @ Driven by Décor
October 29, 2013 at 1:37 amLoving the tip on the stain – I will do just about anything to get out of sanding! Looking forward to seeing your finished doors!
Stacey
October 30, 2013 at 1:20 pmIt looks fabulous! Did you have to seal it for protection? I would love to do the same to our front door.
Jim Lang
November 7, 2013 at 1:13 pmThose are amazing front door inspirations! No doubt that your door will turn out stunning like those. Good thing you found a way to avoid the staining process; you no longer have any reason not to repaint your door. Hope to see your front door once it's done.
–Jim Lang @ RenewalOfMaine
Maricela Milum
November 8, 2013 at 3:52 pmReally? It’s always nice discovering an easy way to get things done without sacrificing the outcome. A miracle stain it is! And I’m sure it would become easily known. I hope the brand has a wide variety of colors. 😉 Maricela@Homecraft®, Inc
William Gulliver
November 20, 2013 at 5:27 pmThe old color of your front door definitely lacks appeal. People living in today’s generation are really lucky because great resources are made available to us. Giving your door the look that you really wanted isn’t that difficult with that gel stain. I can imagine you being so jolly after discovering this product. Haha! A wooden front door will stand out even if it has a darker hue.
William Gulliver @ Up and Above Contractors
Samantha Gomes
November 24, 2013 at 4:54 amThat is so awesome that you made them yourself! I love the whole look of your window, so pretty!
. shower doors portland
David
December 8, 2014 at 4:38 pmDid you use this product on the outside as well as the inside? Also, did you apply any type of of finish over the stain (poly / varnish, etc?)
Thanks!
Fritz
May 11, 2015 at 9:07 amFor the longest time, I have wanted to stain our double front doors in a … frontdoorswood.blogspot.com
Angie
June 13, 2016 at 6:14 pmWhat color did you actually use on your exterior door? About to put my house on the market and need a quick fix that looks great!
Jenny
June 17, 2016 at 3:38 pmI used General Finishes Java Gel Stain for my doors with a high performance top coat if memory serves (best for outdoor use).
Nitu
June 7, 2018 at 10:06 amWe used it 4 years ago on our bathroom vanity and pn our staircase rail. We used a mix Java and Georgian cherry to get it to match our hardwood floors. I did Sand just to take off the glossy poly on it. We were quoted 1000 bucks by our hardwood guys!😬