
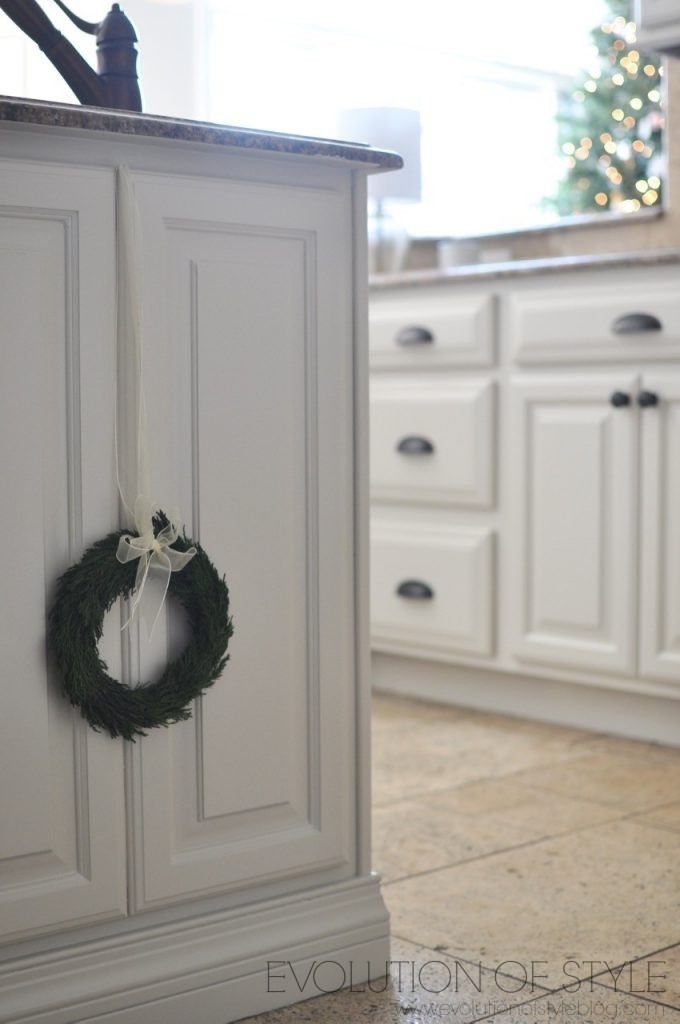
As most of you already know, I left my corporate job almost five years ago (I can’t believe it’s been that long – amazing how quickly time passes when you really enjoy what you’re doing). My only regret about it is that I didn’t do it sooner. I have since continued blogging, and started a side business painting kitchen cabinets and refinishing furniture. I love the transformation process and I receive a lot of painting questions from readers, even requests to travel to their state to paint their cabinets. So, I’ve decided to step out of my comfort zone a bit and go beyond the painting tutorials and the Painter in Your Pocket series that I have shared here on the blog. And since I don’t have a mobile workshop, and I can’t come to all of you, I’m going to offer classes online, holding your hand throughout the process – a Painter in Your Pocket – Online Video Course, specializing in painting your kitchen cabinets.

I’m not going to lie. When I shared this on Instagram and Facebook, and had people signing up, interested in learning more, I felt a little sick to my stomach.
But I know there is a need, and I’m really hoping to help fill it. I know many of you are visual learners, and like to see how things are done and ask questions to a real person. I get it. Taking on a project like painting your kitchen cabinets is a daunting one, and you don’t want to screw it up. When I did my kitchen (the first time I’ve ever painted cabinets), I felt a bit sick as I pulled the trigger on that spray gun, so I know it feels. Talk about feeling sick to your stomach.
Here’s how it will work:
- I will walk you through the process of painting your cabinets, step-by-step, online. If you can’t be there to watch the videos live, or need to watch them over again, you will have access to the recordings, on demand.
- The class will be 4-5 weeks in duration, with a different topic covered each week.
- You will be provided with a full supply list of products and tools that I trust and use regularly.
- You will get online discounts for new cabinet hardware and pulls.
- We will cover everything from choosing paint colors to troubleshooting paint sprayers.
- You will be part of a private Facebook membership group, with a community of DIYers working along with you.
- As part of the Facebook group, you will also have direct access to me – ask me questions, pick my brain, you name it. I’ll be there to help.
Interested? Click here to get on the list and learn about the dates and details as they become available.

I’m nervous and excited about this new online video series, and my hope is that I have a bunch of awesome before and afters that result from this process. No matter the size or age of your kitchen, I know we can give it a refresh. Is there anything else you would like to see as part of this class? I’m all ears, as I’m here to help YOU!

Jenny

44 Comments
Jess
January 8, 2018 at 10:31 amCongrats! This sounds awesome! Way to chase your goasl!
Jenny
January 8, 2018 at 1:51 pmThanks Jess! I’m really excited about the whole thing as I’ve been wanting to do it for awhile now!
Joan Burgert
January 8, 2018 at 1:48 pmI live in Columbus, Ohio. I moved into my house in October 2014. We had a professional painter paint our cherry cabinets white, but we discovered later that he did not prep them well and they chipped horribly. Last year,2016, we had them painted again and the painter took the doors and stripped them and spray painted them. Some are still chipping and it is driving me crazy. I’m thinking of sanding and painting again this summer. Any suggestions, is it hopeless?
Jenny
January 8, 2018 at 1:50 pmDo you know what kind of prep/paint the last painter used?
Joan Burgert
January 27, 2018 at 11:09 amI didn’t realize my entire name would be posted. Can you delete my last name.
Debbie
January 8, 2018 at 2:05 pmWhat if we’re not on Facebook???
Jenny
January 8, 2018 at 2:42 pmI’m looking into another option of having videos available for purchase separately as well so that if you don’t want to be part of the Facebook group, that’s an option as well.
Diane Richards
January 8, 2018 at 2:18 pmI would love to paint my kitchen cabinets and yes, I am terrified. I am very interested and depending on the cost, I would love to follow along visually and be able to ask questions. I really commend you for taking this on!
Jenny
January 8, 2018 at 2:43 pmThanks Diane! It’s been in my head for awhile now, and I’ve decided this is the year that I need to take that leap!
Beth
January 8, 2018 at 3:30 pmJenny-what a terrific idea. You were my go to source online when I was researching how to paint my kitchen cabinets in 2013. Prepping and painting was done over the course of several months as my kitchen was being updated in other ways. I went the extra step of filling in the oak grain which was very time consuming. Using the BM Advance paint and a sprayer for the first time had a learning curve but I am very proud of the 42 cabinet doors and drawer fronts that transformed my kitchen and laundry room. Thank you for sharing your expertise then and for making it possible now to teach others what you have learned through all the kitchens you have worked on since.
P.S. I am also a huge fan of audiobooks!
Jenny
January 8, 2018 at 4:18 pmI love hearing that my tutorials were helpful Beth! I know what a scary and intimidating project it is, so I figured this would be a good way to help people get over the hump. 🙂
Kathy
January 8, 2018 at 5:58 pmI have glossy maple veneer cabinets that look orange. I have heard it is much more difficult to get a professional looking finished product with this cabinet type. Looking forward to your expert advice!
Kathy
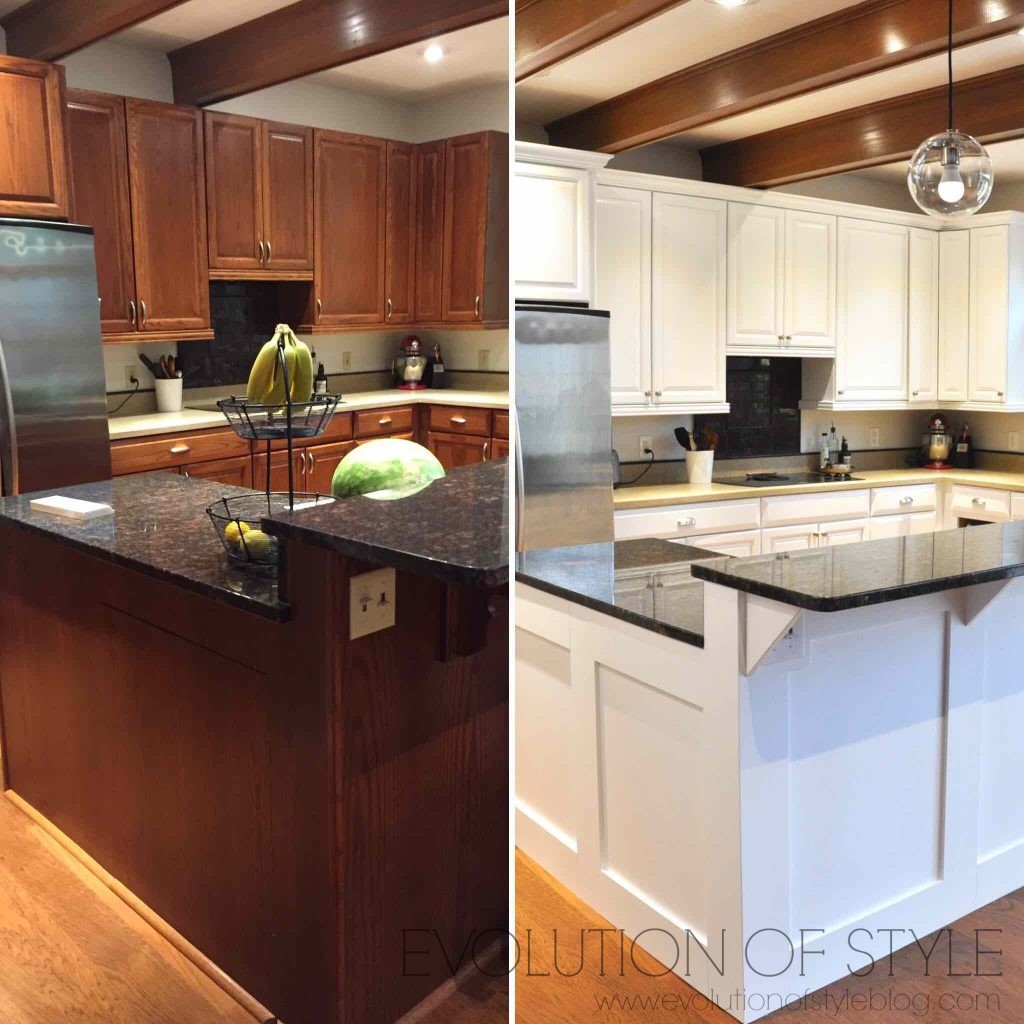
January 9, 2018 at 6:04 amBeautifully redone cabinetry via paint! Question: In the second set of pictures, it appears as if the beams or the cabinets have moved. The beam was over the seam where two different cabinets meet, and in the second picture, the beam has moved over to the right. Also how is there room for crown molding in the second pic if there wasn’t room in the first? Are these different doors entirely?
Jenny
January 9, 2018 at 7:31 amThese are the same doors – the homeowner had a carpenter come in and install molding on the island and crown molding along the top of the upper cabinets. Nothing moved, just the camera angle there. 🙂
Karin
January 9, 2018 at 6:27 amGreat idea! I have been dreaming of painting my own cabinets for a while. It is an intimidating task, for sure and I truly admire that you keep taking it on over and over! One question for you. What normally comes first new countertops or painting the cabinets?
Jenny
January 9, 2018 at 10:48 amThanks Karin! If you’re planning on replacing your countertops, I would do those first. It’s always easier to choose a paint based on colors in a countertop than working in reverse. 🙂
Lisa
January 9, 2018 at 9:58 amExciting stuff Jenny!! You’ll be great at this – especially since you’ll be talking about something you know so well and love doing!!
Cyndy
January 9, 2018 at 1:25 pmYay!! So so excited that you’re going to do this! Yes there is a need and yes, you’re the perfect person to teach us! Can’t wait!
Jenny
January 9, 2018 at 5:35 pmThanks so much Cyndy! I’m really excited about it!
Lori
January 9, 2018 at 4:34 pmWill the course help those cursed with the dreaded laminate cabinets?
Margot Broglin
January 11, 2018 at 2:04 pmI have a situation that I have not seen addressed in any blog to date. We purchased our home 10 years ago and our kitchen cabinets are builder grade oak which the prior owners painted white with latex paint. Many of the high use areas have dings and chips because the paint is not hard. Over the years we have touched up many, many times, but they still look bad. We had a carpenter come out because we were interested in having them sanded and repainted, along with having an island built. He repainted our friend’s cabinets and built them a new bar area and it looks amazing. Anyway, he came out and looked at our cabinets and said that because of the gummy latex paint, it would be more cost-effective to have him build new door and drawer fronts. He said that it would be very labor-intensive to sand the latex paint off of the cabinets. We were not expecting to hear that and we have now reconsidered the whole project. The cabinets are not great, but they are not terrible either. We are now wondering if we would be better off to just rip them out and install new cabinets for the cost. What is your take on this? We really just don’t know what to do at this point.
Jenny
January 11, 2018 at 9:48 pmI’m not sure of the cost involved to do this, but I’m offering it as a suggestion as an alternative to all new doors (which also isn’t cheap). Look around your local area to see if you can find a company that does sand blasting. I’ve seen it done (on video) and it’s amazing. Removes old finishes and gives you a blank slate to start fresh again. I wish I could do it myself! 🙂 If that’s not an option, I would probably replace the cabinets altogether vs. refacing them. Another source might be to contact a cabinet company and see if they can “dip” them to remove the old finish. Just some ideas – hope this helps!
Margot Broglin
January 17, 2018 at 11:43 amI will look into the sandblasting, but I don’t know that I want to put that much time and money into these old cabinets. They are from the early 90’s and are not all solid wood. The doors and frames are wood, but the interior shelves and bases are pressboard and in some of the cabinets where we have heavier items, they are starting to warp. I was hoping for some sort of miracle product that would strip the paint off so we could just repaint them and not have to put a ton of time and money into them. Thank you so much for your advice and ideas!
Win Wuttke
January 11, 2018 at 4:04 pmHi Jess, your website/blog is amazing, so much good information.
I’m in the process of starting to paint our beautiful existing polyurethane finished oak kitchen cabinets.
1. Start with cleaning cabinets, use Simple Green, all purpose cleaner
2. Use Krud Kutter Gloss-Off for deglosser.
3. Next, Zinsser High Hide Cover-Stain – Spray with HVLP Fuji Mini-Mite 4 Platinum paint sprayer, 2 coats
4. Next, either Benjamin Moore, Insl-X Cabinet Coat – Spray with same paint sprayer, Acrylic Enamel, 2 Coats
4. or Rust-Oleum Professional High Performance Protective enamel – Oil Based, 2 coats
The dilemma I have is with the final coat, BM – Cabinet Coat or Rust-Oleum High Performance Enamel.
Do you have any recommendation for the final top coat?
Thank you
WW
Jenny
January 11, 2018 at 9:35 pmI don’t have any experience with either of those products, but I can tell you that with the Benjamin Moore Advance and the PPG Breakthrough, you don’t have to topcoat either one of them. Do either of those products indicate that you need to top coat them?
Win Wuttke
January 12, 2018 at 12:45 amThank you, my understanding both products don’t require a top.
INSL-X CABINET COAT Acrylic Enamel
http://www.insl-x.com/product-detail/inslx-products/cabinet-coat-enamel
Professional High Performance Protective Enamel – Oil Based
https://www.rustoleum.com/product-catalog/consumer-brands/professional/high-performance-protective-enamel
Jenny
January 12, 2018 at 9:15 amIf they don’t require a top coat, I’d say leave it alone. 🙂 The topcoat has a tendency to yellow the paint.
Win Wuttke
January 12, 2018 at 8:22 amHi Jenny, you mentioned Benjamin Moore Advance and the PPG Breakthrough, which ones have you used and had good success? We are looking at the color white or off-white.
PPG, BREAK-THROUGH!® 50 Interior/Exterior Water-Borne Acrylic
PPG, BREAK-THROUGH!® 250 Interior/Exterior Water-Borne Acrylic
BM, ADVANCE Interior Paint- Primer (790)
BM, ADVANCE Interior Paint- Satin (792)
BM, ADVANCE Interior Paint- Semi-Gloss (793)
BM, ADVANCE Interior Paint- High-Gloss (794)
Jenny
January 12, 2018 at 9:14 amI have used the BM Advance in a satin finish and the PPG Breakthrough 50 in a Satin finish. Both are great products!
Win Wuttke
January 12, 2018 at 12:01 pmThanks for the Satin finish recommendation,.this will be more forgiving than the Semi-Gloss.
This morning I spoke with a Benjamin Moore factory rep and he recommended the BM INSL-X CABINET COAT Acrylic Enamel with the BM Fresh Start High-Hiding All Purpose Primer Primer (046) (Acrylic) The reason noted, the Advance tends to yellow after time. The acrylic primer will bond to the polyurethane better than the oil based primer.
Jenny, there are so many product choices it’s hard to choose which on is best, I know I want the best professional result and willing to go whatever it takes.
WW
Win Wuttke
January 11, 2018 at 4:17 pmHi Jenny, sorry I addressed you as Jess, can you change my last comment to you as Hi Jenny.
Thank you
WW
Natalie fleischer
January 14, 2018 at 10:07 amI am really looking forward to your on-line tutorial! Just registered for more info. I love painting and was just talking to my sister yesterday about coming up with a one year transition plan to quit my stressful corporate job to paint interiors full time. My cabinets need to be painted and I am planning on working on the job this Spring and depending on how it goes and how much I enjoy the transformation, I want to consider that service as part of my business here in south jersey. I would love to connect on the business start up journey you went through. I’m not a blogger but am hoping that there’s still a way to get out there and pursue something that I am passionate about.
Jenny
January 14, 2018 at 3:48 pmIt sounds like we have a similar background Natalie! Although I didn’t anticipate doing kitchens as a business when I started – it kind of grew after doing my own kitchen, and then painting kitchens for friends. Who would have guessed? It’s definitely a good niche to be in though because a lot of painters don’t want to touch kitchen cabinets! I really love it though!
Carolyn
February 3, 2018 at 6:09 amI have oak cabinets that I’m ready to paint white. I’m such a perfectionist and wanting the end result to look professional. I’ve viewed many videos and read countless tutorials. I’m so excited I found your site and so ready to start this project. Let the fun begin.
Dalanna
February 8, 2018 at 5:32 pmHave you ever used paint brushes rather than spraying cabinets? And what are your pros vs cons using a sprayer? I want to take your class as we are going to redo our cabinets this spring and want to have everything ready to go!! Thanks for your info!
Jenny
February 8, 2018 at 10:19 pmGREAT question!! And 90% of the time (or more), I hand paint the frames in the kitchens that I paint. I will spray the kitchen if it’s really large, or really detailed, but most of the time I will hand paint. The pros of spraying is that you get a sprayed look on the frames and the doors (I ALWAYS spray the doors though), but again, unless you have a lot of detail, it’s A LOT of extra work in terms of prep. And really, at the end of the day, the doors and drawers are pretty much the stars of the show. Not to say that frames aren’t important, but they kind of fade to the background once the doors are installed.
Kate
March 11, 2018 at 7:59 pmI’m getting ready to paint my maple cabinets and I’m super nervous about how the outcome will be. I’m debating on spraying the boxes, but i know it’s a lot more work than rolling. I already have the sprayer and my kitchen is about your size.. which would you recommend I do? There is also not too many details at all in my cabinetry. Another question.. HOW have yours held up??
Thanks Jenny!
Jenny
March 13, 2018 at 10:07 pmIf you have a large kitchen, I would consider spraying the whole thing. While the prep is a lot of work – once you start spraying, it’s quick and you have a great finished product. Mine held up great – I just got a bit bored with the color and sprayed them again! :-0 Not my brightest moment.
Michelle
April 14, 2018 at 3:29 pmNice work! Just wondering though, in the second set of pics, one one with the bananas in the basket, how it it that there is crown mouldings at the top of the cabinets but does not appear to be any in the “before” pic. Nor does there seem to be any room to have placed them after. Photoshop?
Michelle
April 14, 2018 at 3:36 pmEven the center beam isn’t in the same place??
Jenny
April 14, 2018 at 3:57 pmNo beams were moved in that makeover, I can promise you that. 🙂
Jenny
April 14, 2018 at 3:56 pmNot Photoshopped – they added crown molding to the top of the cabinets, and the angle of the camera makes it look a little bit different.
Rick Gruber
June 5, 2019 at 5:37 pmJenny & co
First, thanks for web site. The info and advice is a godsend, particularly about “prep”. After doing the research, meaning looking at all of the web sites and youtube posts, I decided to attack my kitchen. The cabinets were builder grade oak, which were OK. There were 43 surfaces (doors and draws), plus the frames (apprx 300 sq ft). This is what I’ve learned:
1. Heed Jenny’s advice about prep! This type of project is going to require a lot of sanding. There is not getting around it. It is also very labor intensive. If you’re note prepared to invest the time, don’t attempt the project. It will disrupt your kitchen, so make sure everyone is on board!. Label Everything!!!!!. This will help put the doors back on the frames without having to adjust anything.
2. Invest in the right tools. Little things like contoured sanding blocks makes dealing with beveled edges and corners easier to deal with. If you have a multi-tool or mouse sander, in addition to an orbital sander, you’ll cut time off the work and do a better job.
3. Build a paint rack and drying rack. There’s plenty of designs on pinterest and youtube. This small investment (about $50-$70) will allow you to paint both sides of a door or draw, without having to deal with much touch out. Most importantly, it will reduce the amount of space that you need to allocate for drying. Think of it this way. My cabinet surfaces need approx 300 sq ft when laid out to dry. That’s a whole room. With the drying rack I built, i only need about a 4′ X 6′ area.
4. My Krudkutter phase was KrudKutter, dry, Sand, KrudKutter,, wipe down, then let dry.
5. Aquacoat is your friend!. I found that about 3 coats deals with the grain. Put it on with gloved hands. This way you can “feel” the grain, when you apply it. Let it dry overnight, then sand with 120-180 grit. Repeat!.
6. Two coats of primer were needed. Sand with 220, after each coat. Let each coat dry overnight.
7. I used BM Advance, with a roller, since I did not have access to a sprayer. Since this was a one time project, I did not want to invest in one. The roller was a 1/4″ woven nap from Wooster.. I let the BM dry one day, before applying the 2nd coat. I also did a light sand with 220 grit, in between the 1st coat and the 2nd coat.
8. After 30 days, did a touch up on the final coat. I managed to chip a corner when putting one of the doors back on the frame. That’s fixed now.
The results are great. There are no grain marks and the roller with BM looks almost like a spray job. If I could, I’d post pic, I would. If people want, they can email me and I’ll send info about the racks and pics of the before and after. I can also share the project cost.
Jenny – thanks for your advice and guidance. Without them, this project would not have gotten off the ground.
Rick Gruber
Denise
February 23, 2020 at 6:06 pmMy question is regarding the paint PPG or the BM,if I use a sprayer does the paint have to have to be thinned? We were thinking of renting a paint sprayer or purchasing, but am not sure of the price tag? Thanks