
This kitchen is one that has come a long way from where it all started. When I first met with the homeowners, the kitchen had most of its original finishes when it comes to flooring, cabinets and countertops. They were looking to change things up in a big way, with new flooring, counters, backsplash and painted kitchen cabinets in Sherwin Williams’ Pure White and Cityscape (along with painting the walls). It was a big job that took awhile to get from Point A to Point B (the homeowners are handy too, and did a lot of work themselves), but that’s just the way these projects go most of the time. But in the end, it all came together beautifully, and the homeowners were kind enough to send me photos of the finished space.
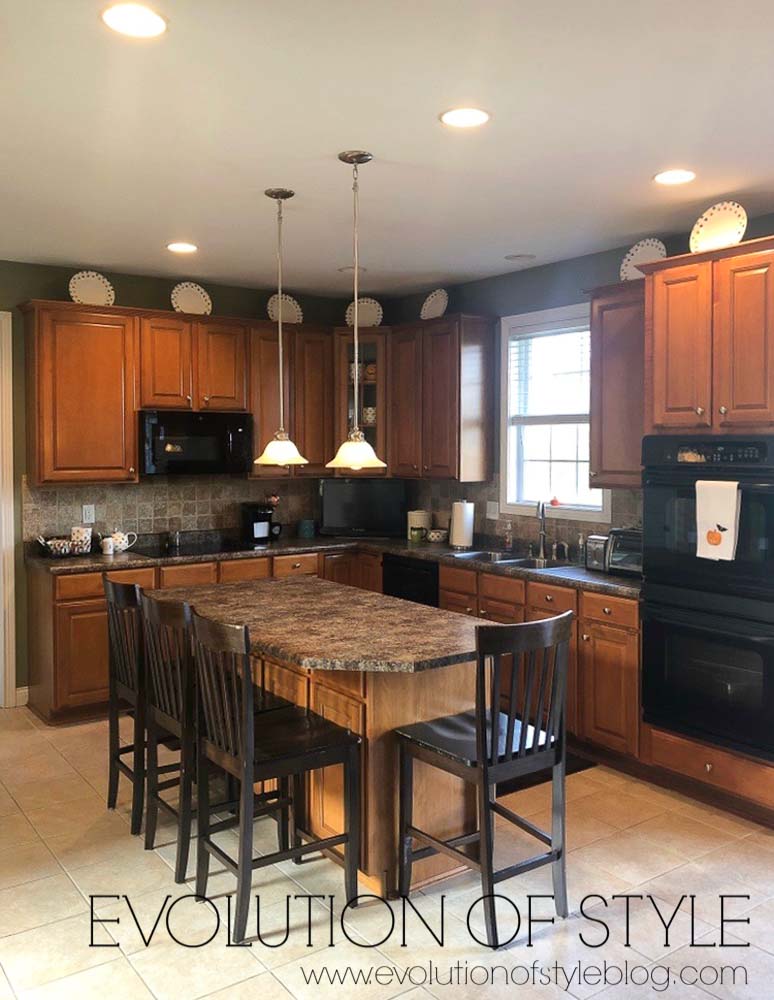
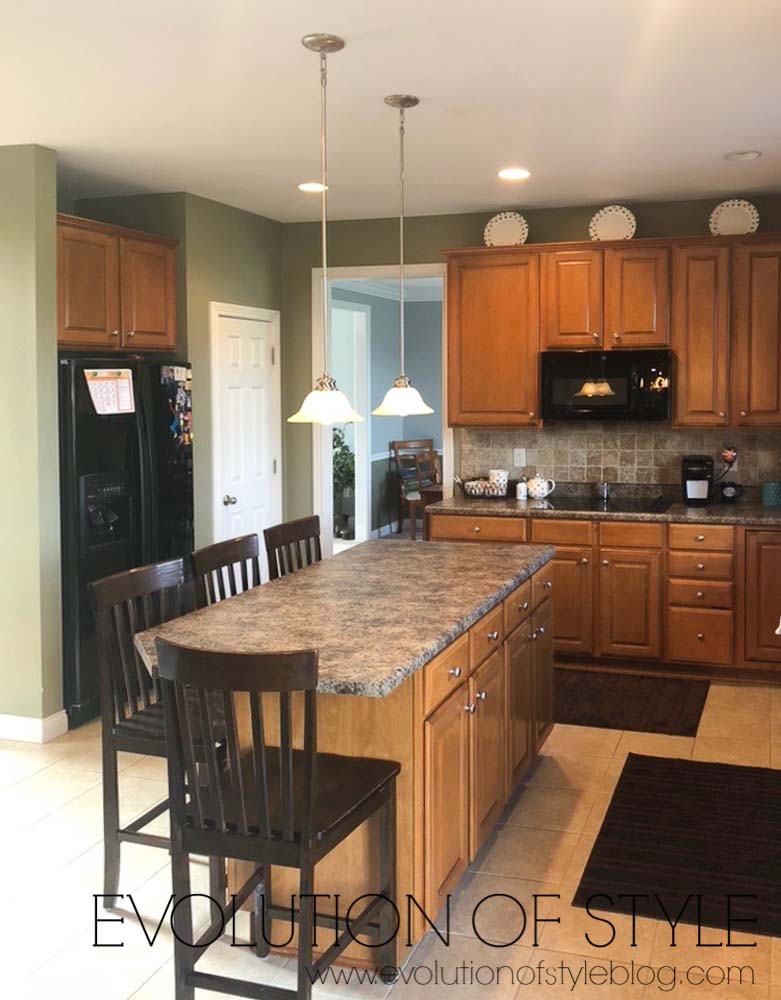
Before – Lots of Brown
This kitchen looks a lot like many out there that I see. An overload of brown. Brown flooring, brown countertops, brown cabinets, etc… People are just to the point that they’re over the brown and ready for something new. But the great thing is that their cabinets were in good shape, and the layout works, so there is no need for a total gut job. Work with what you have and rework what you need to in order to make it functional.
During…
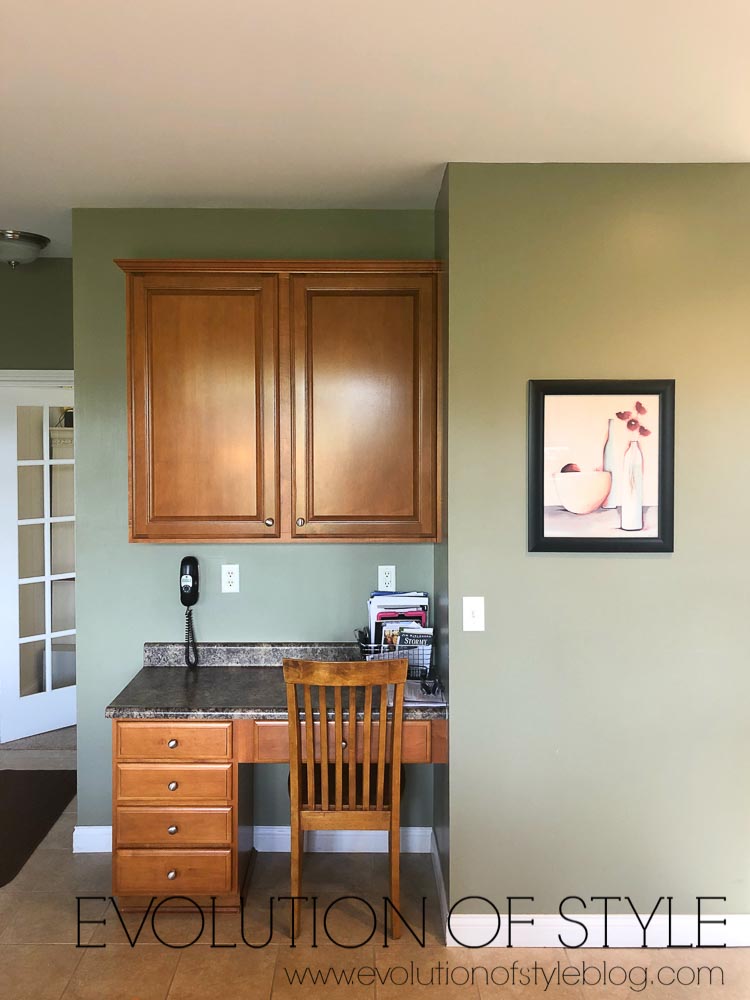
One thing that the homeowners reworked was their planning desk. They ended up removing it, and making good use of the space by building out a larger closet/storage area.
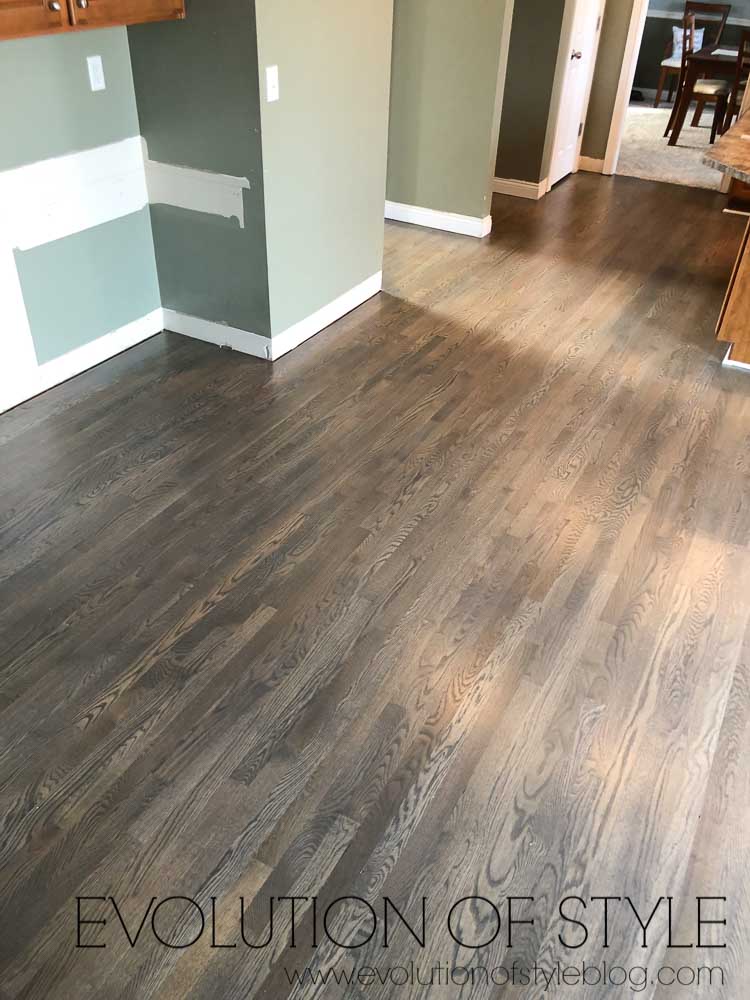
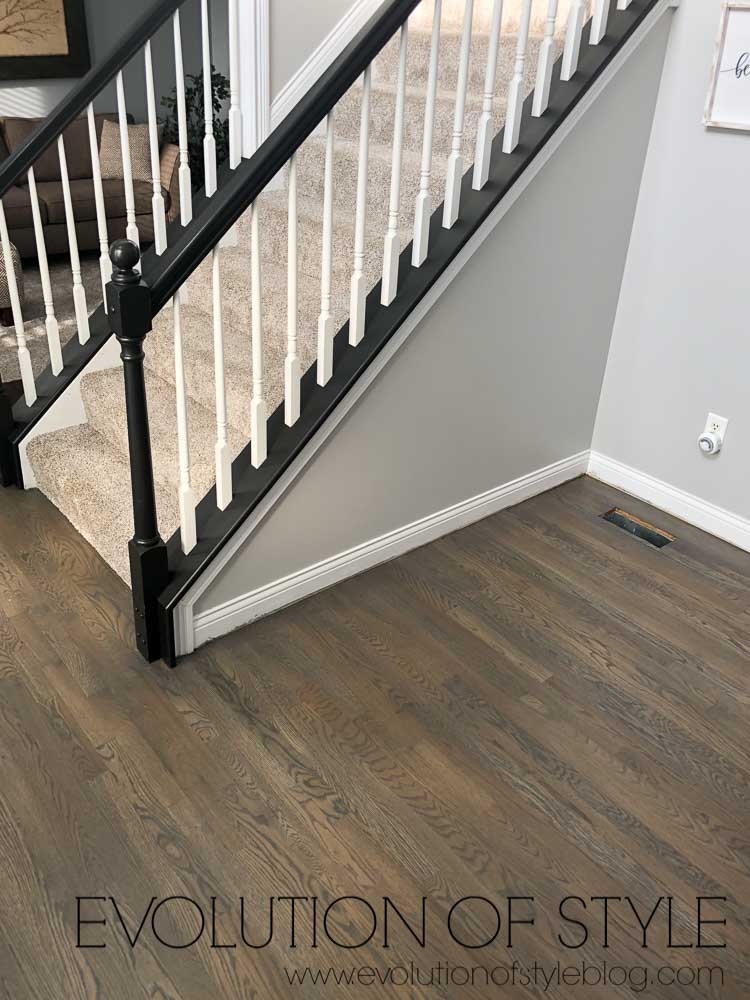
You can see how that was starting to come into shape here as the floors were being installed. They installed unfinished hardwoods and then did the staining themselves. The stain that was used is a custom mix that gave this gorgeous grayish brown color. It’s perfect in here, and I’m super impressed that they tackled it as a DIY project. That’s no small feat.
The front entry was transformed as well – banister and all! Here is where it began.
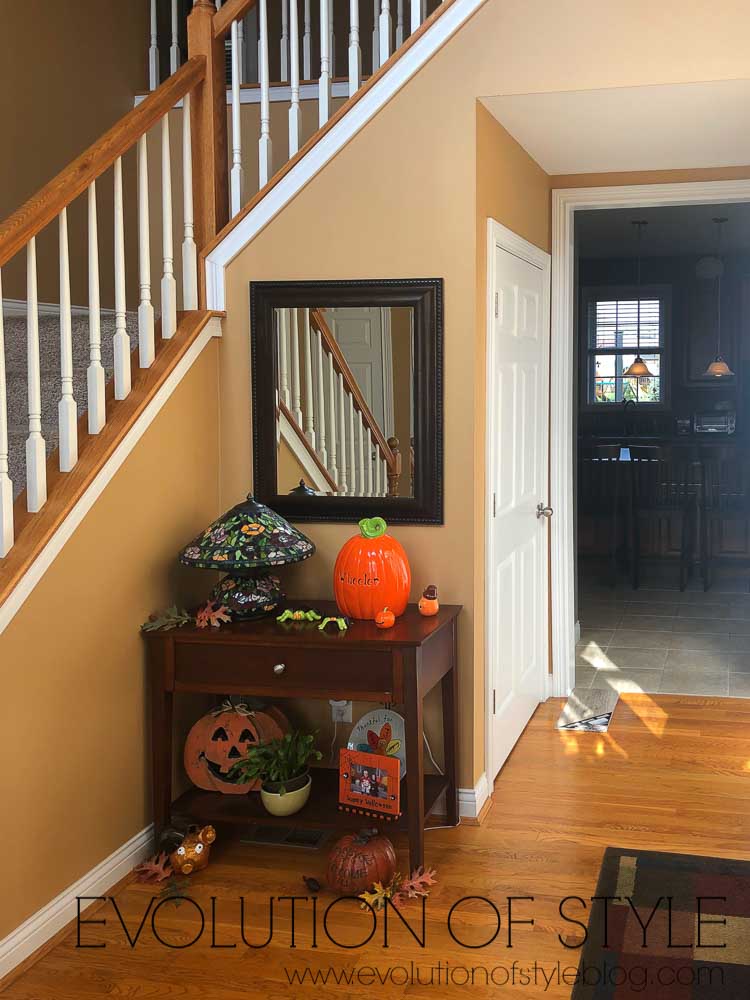
And here it is after they worked some magic. Beautiful. It gives off a completely different vibe with all of the changes that they made.
After – Sherwin Williams’ Pure White and Cityscape
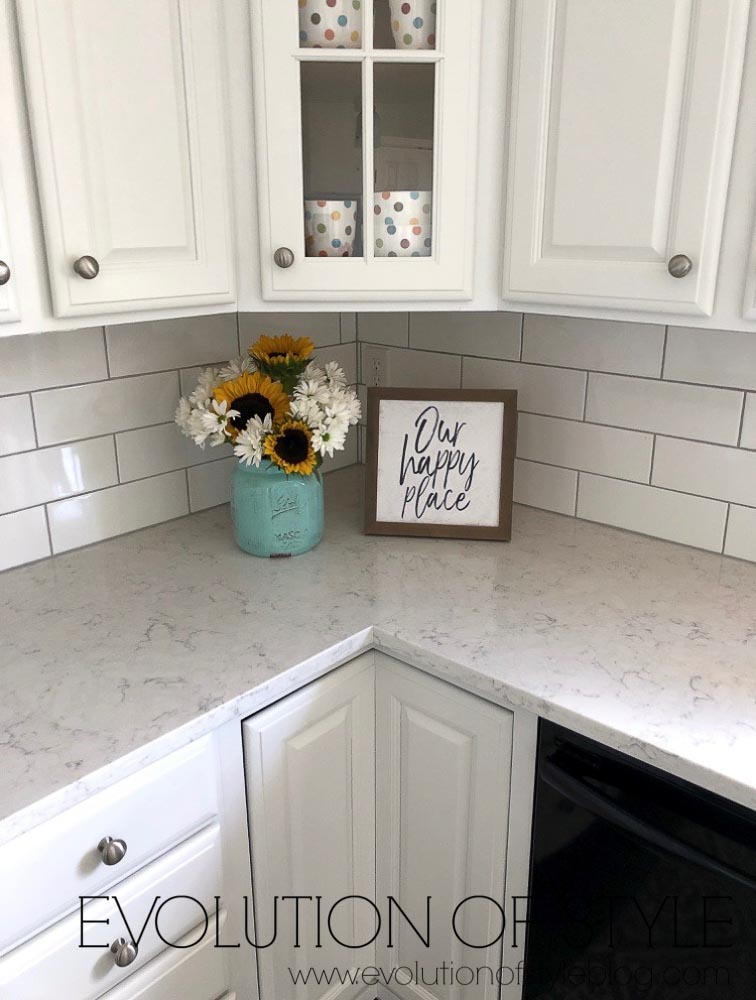
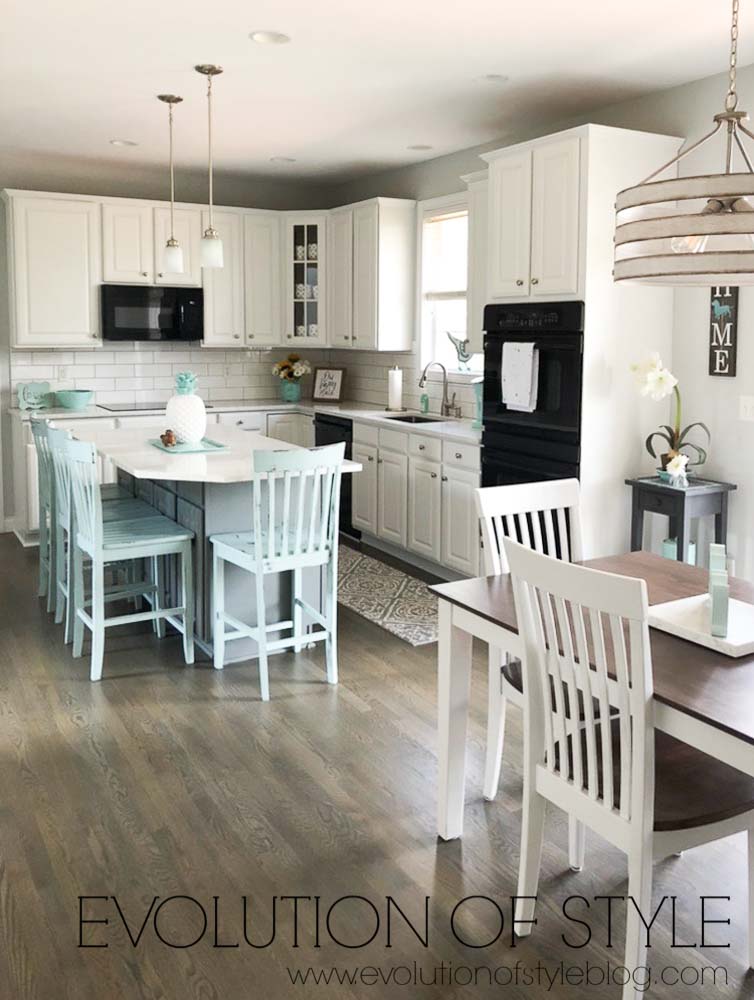
Back in the kitchen, the homeowners opted for Sherwin Williams’ Pure White (SW 7005) and Cityscape (SW 7067) for the kitchen cabinets and island. The island color came about after we first painted it in Coventry Gray. We thought that Coventry Gray would be a good fit for the space, but the homeowners ultimately wanted something a little darker, and Cityscape fit the bill perfectly with the countertops and flooring. (Note: While these colors are Sherwin Williams colors, I did not use Sherwin Williams products, and had them color matched.)
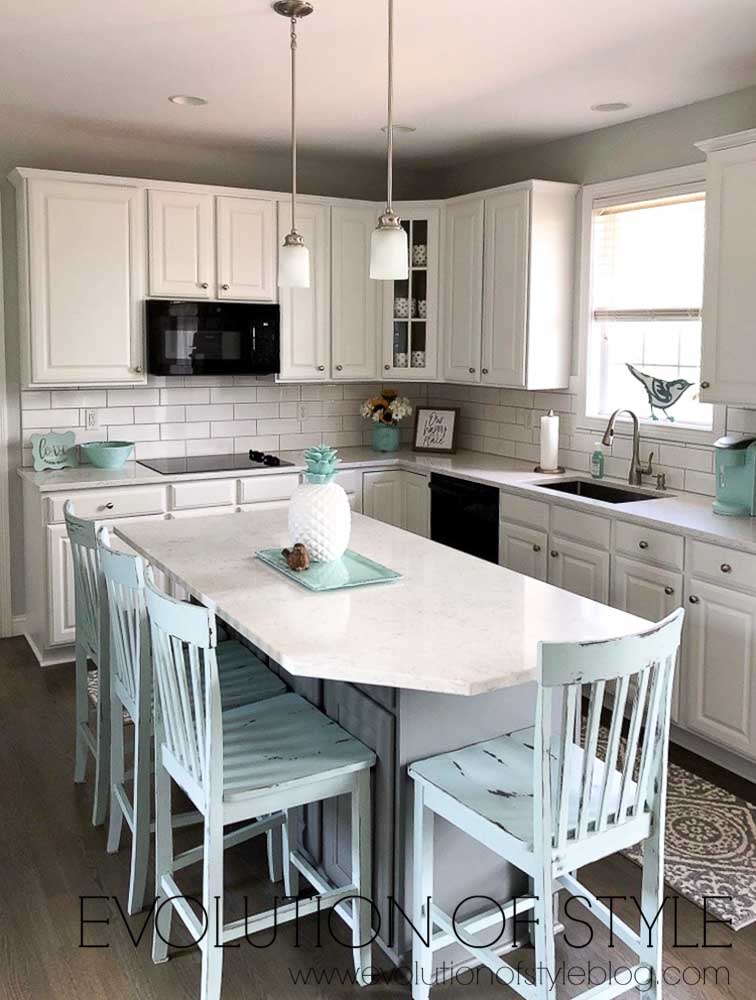
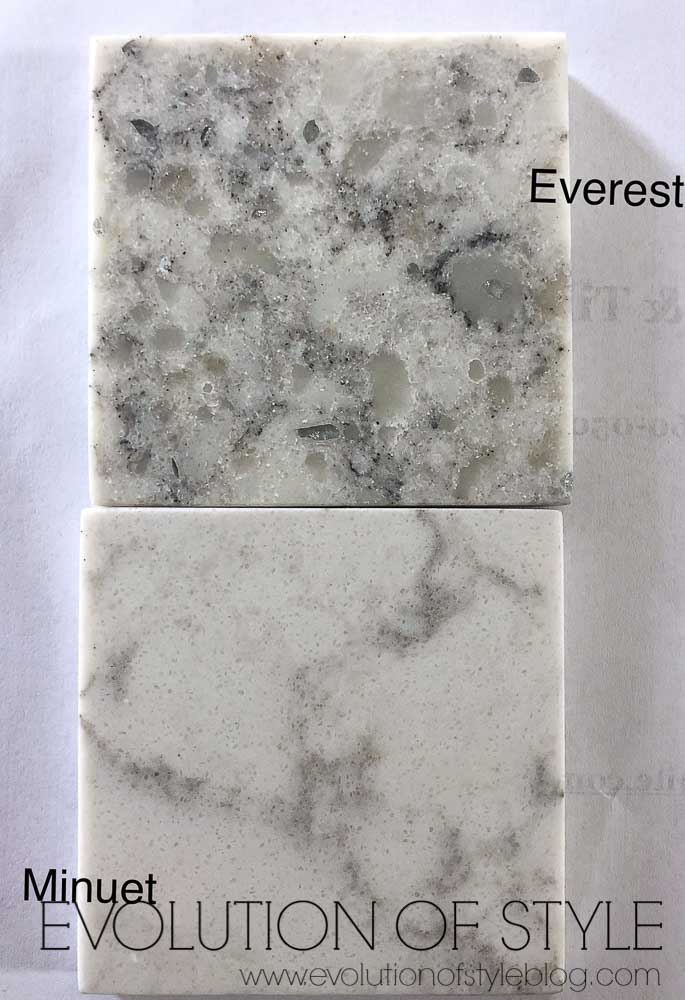
The homeowners opted for quartz counters in their kitchen – LG’s Viatera Quartz. I hadn’t seen this particular brand before, and they were debating between Everest and Minuet. Minuet was my favorite – less busy and more of the clean, marblesque look people are wanting now. That’s what they ended up choosing.
It pairs really well with the large rectangular subway tile too.
The homeowner also gave the stools a coat of paint to go with the new vibe in here.

I’m pretty sure she refinished the dining room table and chairs. Again, these homeowners aren’t afraid of getting their hands dirty and tackling projects themselves. Did you notice the new light fixture too? So sharp.
One of the best parts of what I do is seeing these transformations come together, without having to live through the renovations firsthand. Did I mention their master bathroom was going through a renovation at the same time? The fact that they made it through all of this upheaval without losing their minds is nothing short of a miracle. But in the end, I think most people will agree that the hassle is worth it (although they may say that they’ll never do it again).
If you’re interested in how these transformations are done, check out this post here. If you’d like to check out my favorite tools and products, you can find them here. Are you in the Dayton/Cincinnati area and need a quote? Contact me!
Jenny


15 Comments
Lillian Duncan
September 23, 2019 at 1:48 pmIf you didn’t use Sherwin Williams products what did you use?
Jenny
September 23, 2019 at 4:22 pmI used PPG Breakthrough on this kitchen.
Kim Jorgenson
September 23, 2019 at 2:35 pmLovely…!
Nicole
September 23, 2019 at 3:28 pmThat looks like a very cost saving updated kitchen. In sure cost didn’t allow but I would have changed the Island top to be a true rectangle and gotten rid of the weird angles.
Jennifer Boone
September 23, 2019 at 5:28 pmLooks real good. I would have changed ouf pendant lights for something bigger. And i don’t like the stools. Takes away color of the island. Also, i agree about the shape of the island. But its a great job.
Nephi Mitchell
September 23, 2019 at 9:44 pmI’ve been doing almost the same thing to my house!
https://www.youtube.com/user/nephimitchell
Jenny
September 24, 2019 at 8:43 pmLove those floors!!!
Nephi Mitchell
September 25, 2019 at 12:23 amThank You!
Kristin salazar
September 23, 2019 at 11:40 pmSuch a beautiful transformation!
D Himsl
November 5, 2019 at 12:02 pmThank you for the post! Do you have an after picture of the new cabinet from where the desk was removed?
Jenny
November 5, 2019 at 9:47 pmIt was replaced with a large closet. Sorry – no photo!
Dawn M. Irvine
April 13, 2021 at 1:19 amThe kitchen is gorgeous!! Could you please tell me the paint color that was used on the bar stools? Thanks so much!!
Jenny
April 14, 2021 at 10:22 pmSorry – I didn’t do the stools – I don’t know the color.
Kimberly Satterfield
August 31, 2024 at 11:21 pmlove all you did in there. gorgeous! what kind of sink and faucet are u using? im redoing ours and i want similar style
Jenny
October 16, 2024 at 10:19 amThis was a customer kitchen – sorry I don’t have the faucet/sink info.