Board and batten is a great way to add character to your home, and it also has the added benefit of easy fingerprint clean-up if you have kids. I love it to this day, and I think it just makes everything look crisp and custom.
I gave you a
preview to the late night insanity in starting our board and batten project just two days before Christmas. Well, we have one project that is
done. The hallway as you enter our house from the garage was every mother’s nightmare. It was painted in
flat paint. Flat paint. Who paints
walls in flat paint?!? Perhaps someone with no children…
So, since this hallway is a magnet for fingerprints and scuff marks, I figured it would be a good place to start our board and batten journey. Mind you, we decided to take the red-eye on this trip and started working on it at about 11:30 PM on December 23rd. Yes, insanity rules.
Here is the photo montage – sorry for the before pictures – I was in a hurry to capture a few since I don’t typically take pictures of hallways just for kicks.
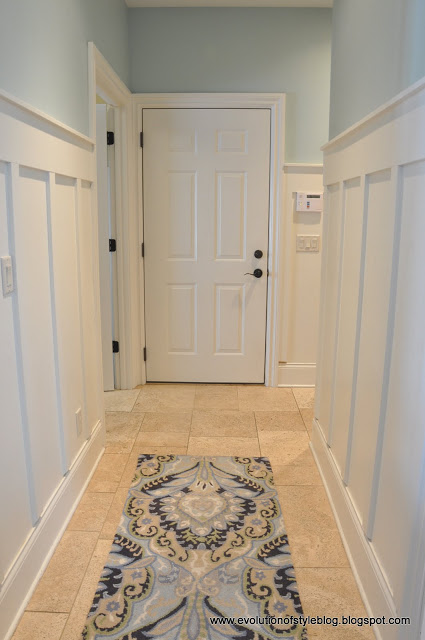
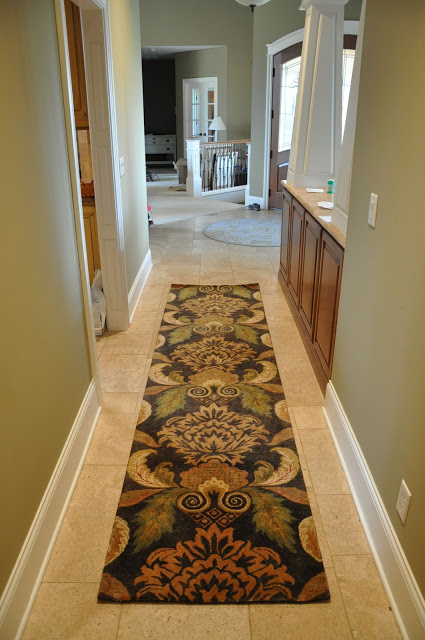 |
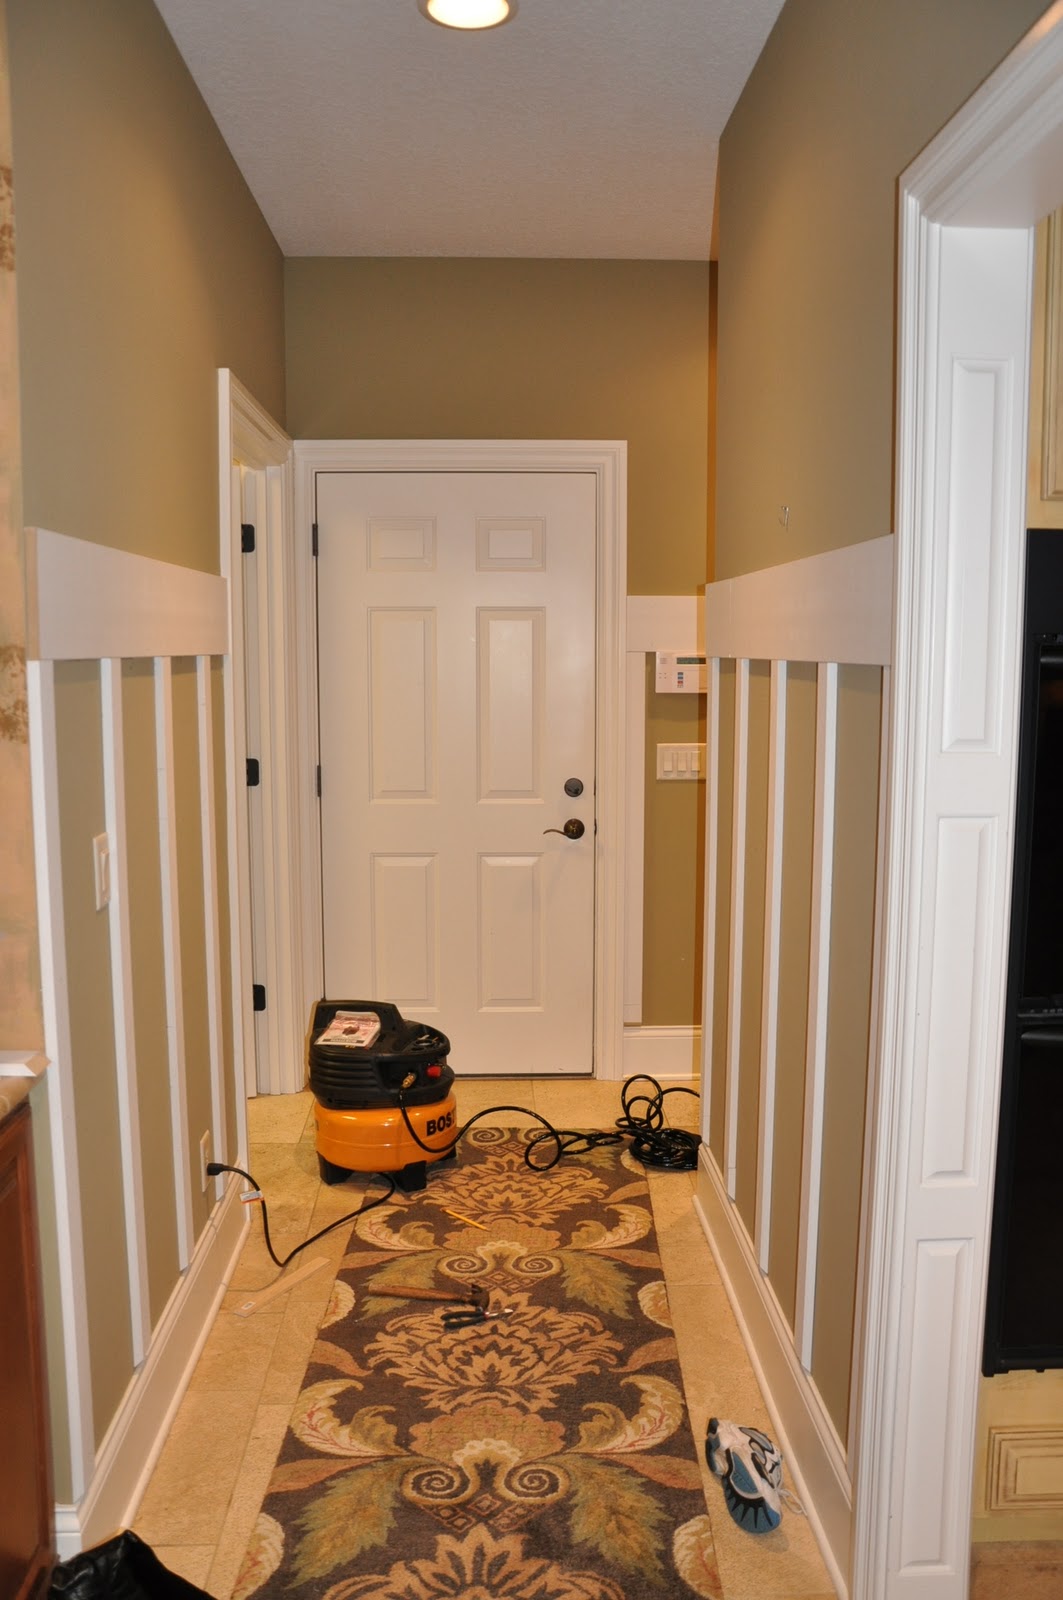
| Kind of a before picture – I was actually taking a picture of my new rug. Isn’t it pretty? |
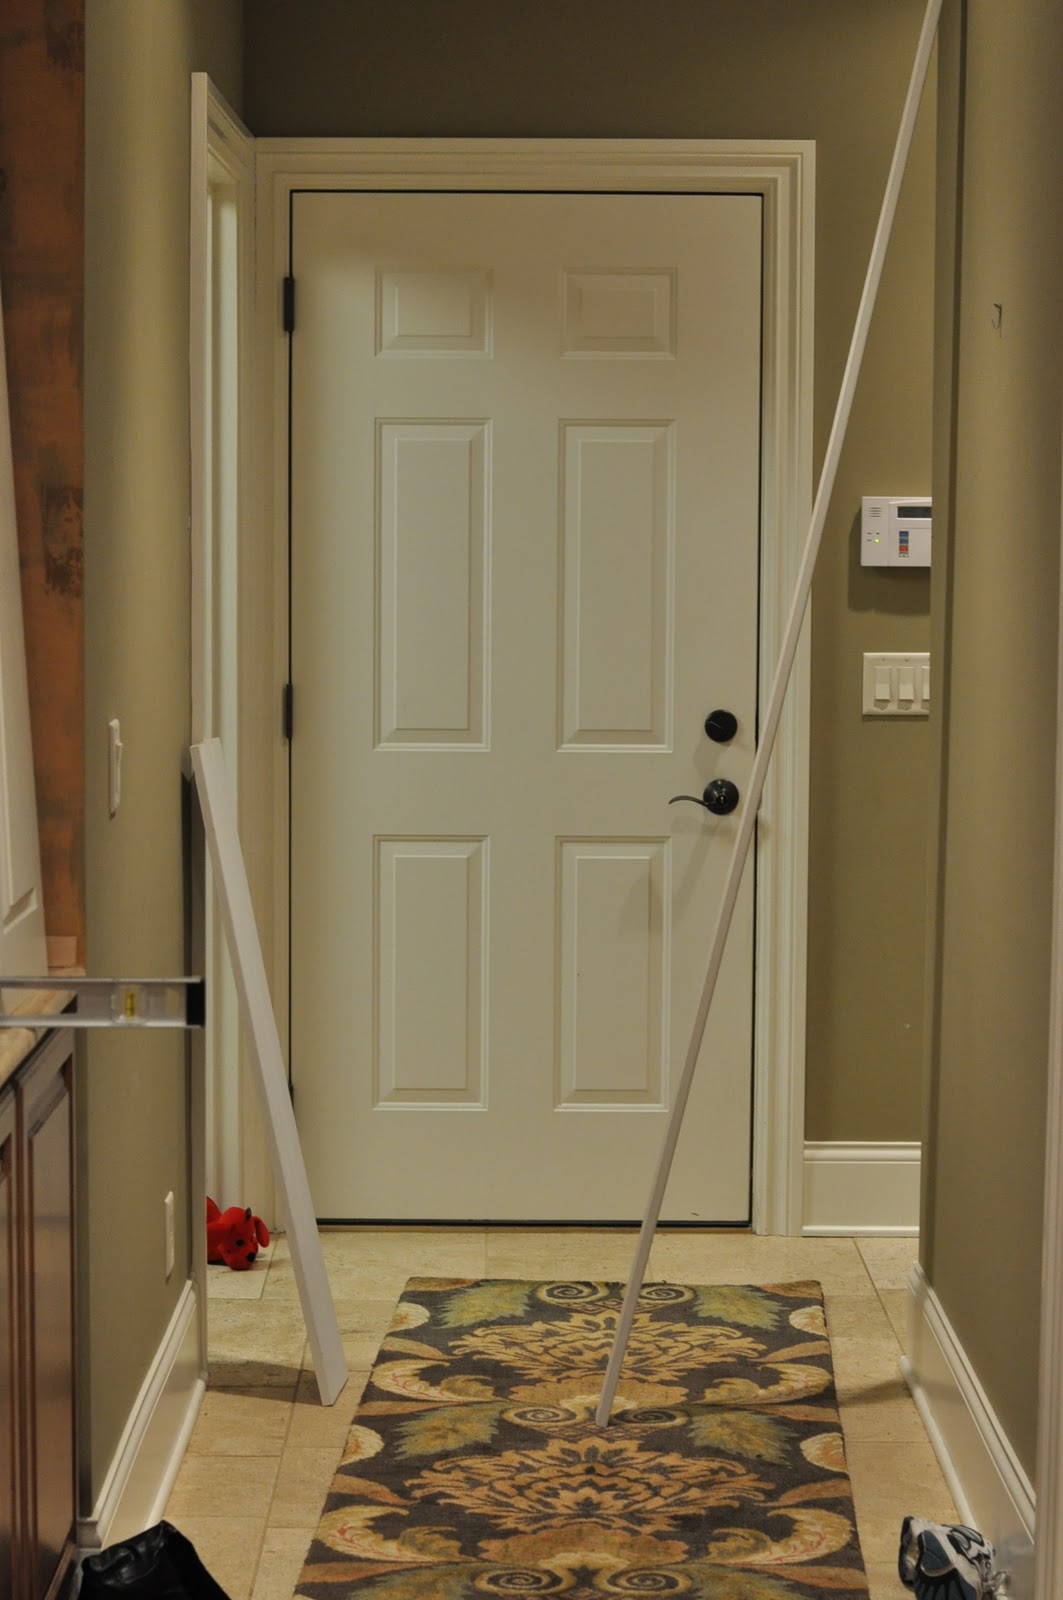
 |
| A picture from the opposite direction – at the beginning of the insanity. |
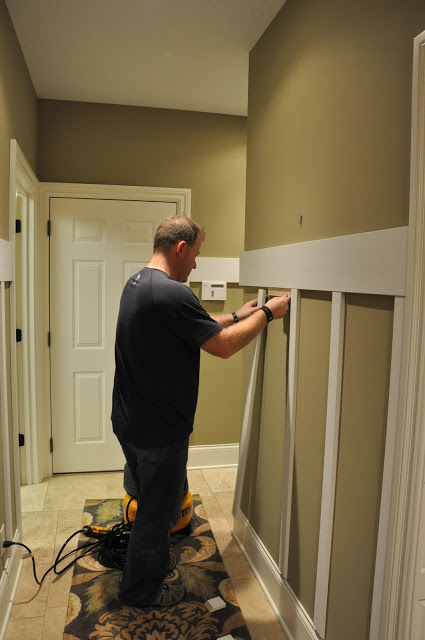 |
| The hubby measuring out the distance between the boards with a trusty paint stick! |
 |
| Boards are up! |
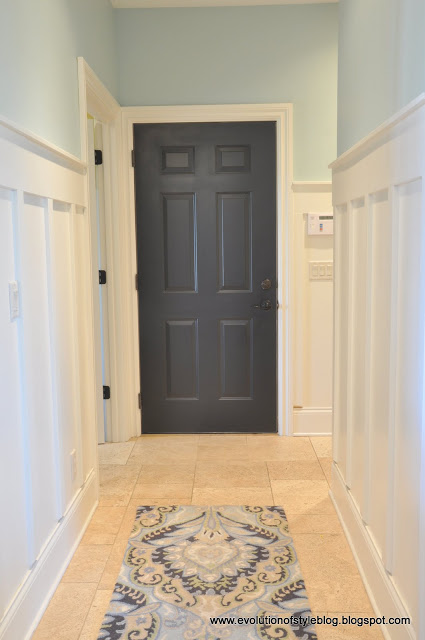
 |
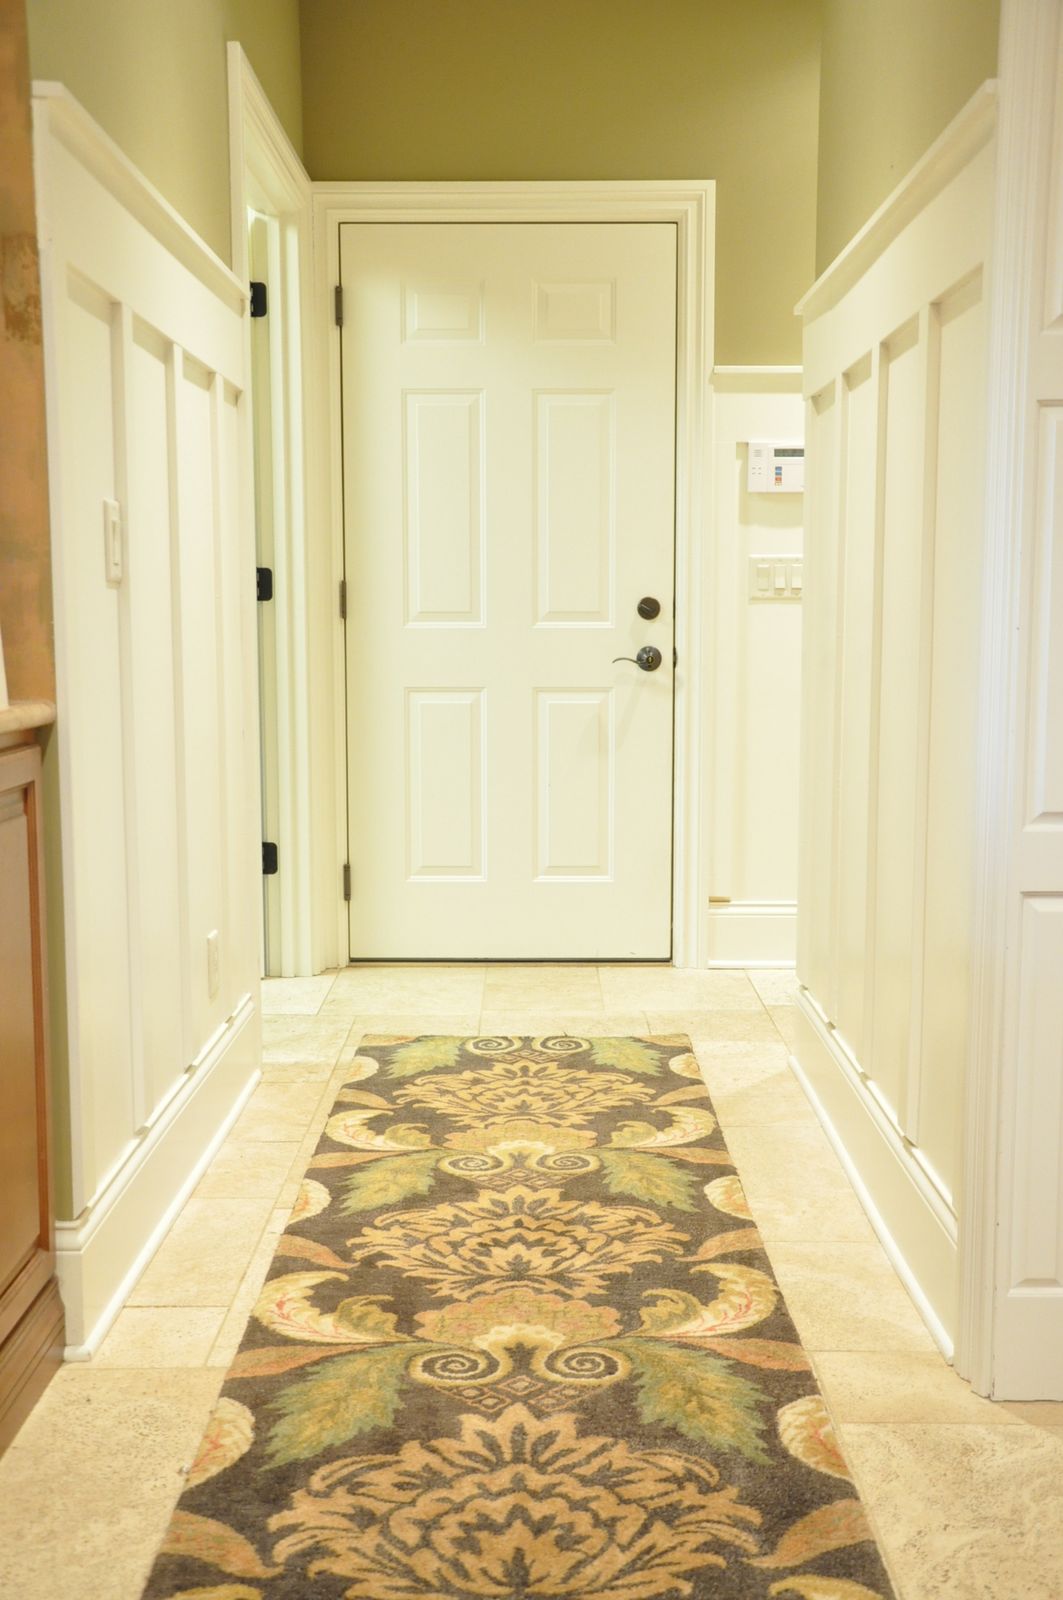
| AFTER – A crisp and clean space. |
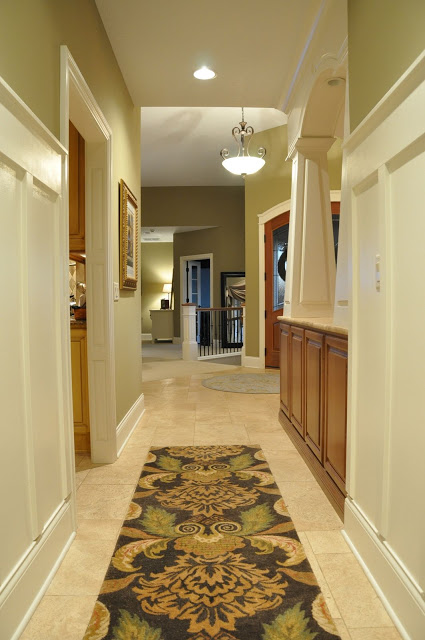 |
| AFTER – View from the garage door |
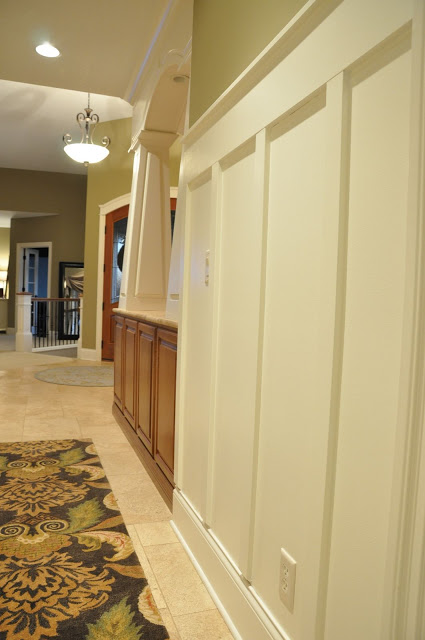
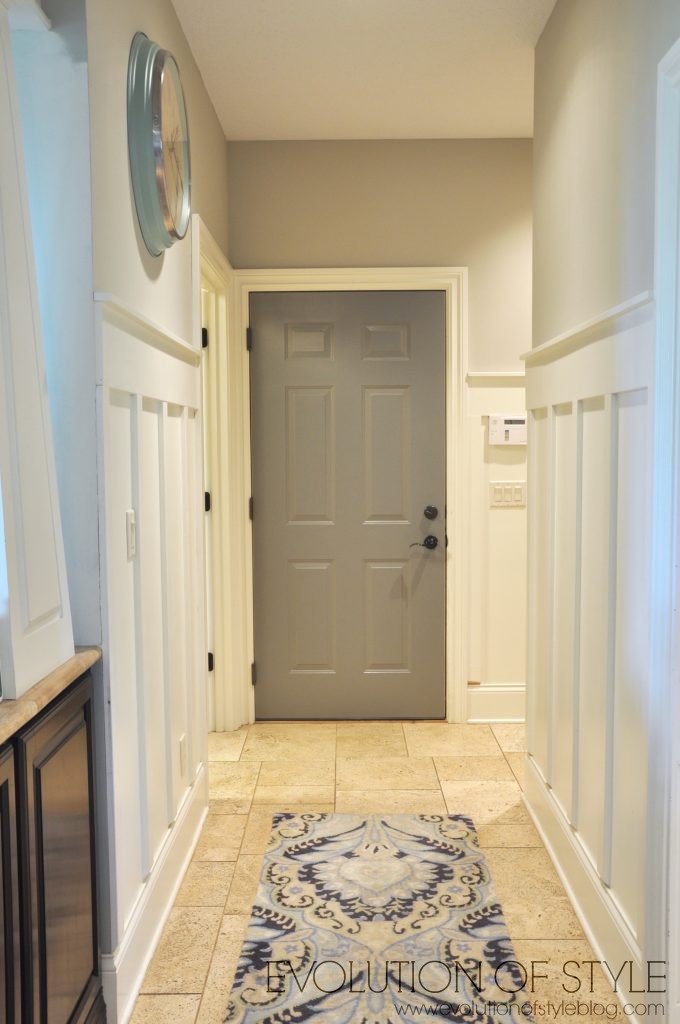
 |
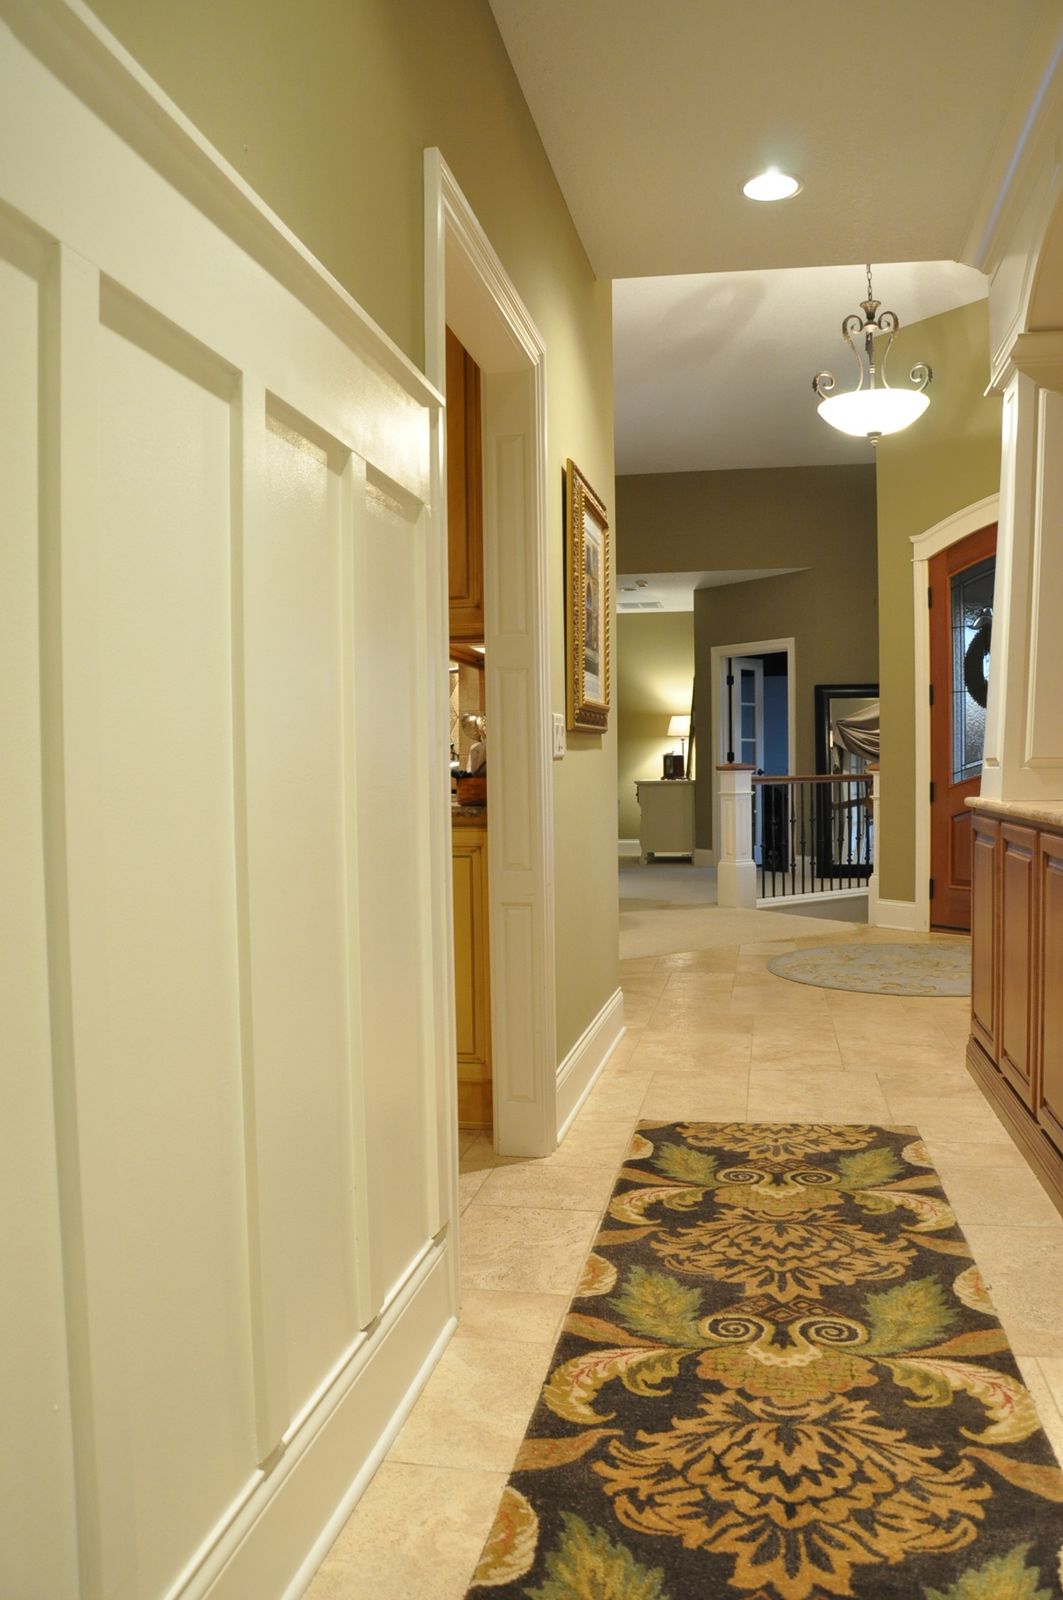
| Another view – added another piece at the top to give it a more finished look |
 |
| And another view in case you haven’t seen enough |
Our hallway has gone through a few more makeovers as the years have gone by, but the board and batten has stayed the same. I still love it!
And here it is now –
Material Details
I have received a lot of questions about the board sizes and the measurements I used. Here are the details:
The wood we used was primed MDF. The sizes are as follows:
- Vertical boards: 1 x 2 1/2″ mdf
- Large horizontal board: 1 x 7 1/2″ mdf
- Top “trim” pies 1 x 1/2″ mdc
Additional tools needed:
The spacing in between the boards was about 12 inches. We used a paint stick as a guide. You’ll want to measure your wall to make sure that the boards are able to be evenly spaced, and reflective of one another so that it is aesthetically pleasing.
TIP: Cut the bottom of your vertical boards at an angle so that they “taper” towards the trim (assuming you’re not going to replace your baseboards). That really helps give it a more seamless look overall.
As for the height, that’s a matter of personal preference. Ours are about 65″ high, from the floor to the top of the trim piece. But, you can eyeball it and see what works best for your space. We have 9′ ceilings , so that height worked best for us.
We caulked around all of the mdf pieces and the paint that we used was an antique white (Porter Paints) in a latex semi-gloss that matched our trim paint.
Jenny
Related
I’m Jenny, a wife of 28 years, mother of three, and a corporate drop-out. I’m a creative minded blogger, business owner and DIYer, and love transforming furniture, cabinets and rooms in my home. I’m a card carrying paint geek, and am always amazed at the power of paint in making budget-friendly updates to your home. I’m a serial house-stalker, and never tire of a great home tour or a before and after renovation. I’m a firm believer in restyling, refreshing and renewing things in your home to make it your own - without breaking the budget. I’ll show you how!


87 Comments
2munckinsmom
January 29, 2011 at 1:55 pmAwesome! What is the color on your hallway walls?
Heather B
January 31, 2011 at 8:23 pmCould you share some details? Did you buy the boards already white or paint them before installation? What size boards did you use? How did you decide your height and spacing? Did you paint in between or install something? Did you caulk? Why size board is in top? I love this and would love to try it but I need more guidance or I'm sure to screw it up! Thanks!
Jenny
February 26, 2012 at 4:13 pmThe wood that we used was primed MDF. Here are the sizes:
Vertical boards – 1 x 2 1/2" mdf
Large horizontal board – 1 x 7 1/2" mdf
Top "trim" piece – 1 x 1 1/2"
The space in between the boards was about 12 inches I believe. I
think I used a paint stick as my guide! 🙂
One tip that I can give is to cut the bottom of your vertical boards
at an angle so that they "taper" towards the trim (assuming you're not
going to replace your baseboards). That really helps give it a more
seamless look overall.
As for the height, that's a matter of personal preference. I think
ours ended up being around 65" high, from the floor to the top of the
trim piece. But, you can eyeball it and see what works best for you.
We have 9" ceilings, so that height seemed to work best for us.
Megan
November 19, 2017 at 11:21 amWe just found your blog! Love the B&B! We are gearing up to do this in our back entry and have a question. Did you nail the verticle boards into studs or just the drywall? Did you use any glue to secure them?
Thanks!
Jenny
November 19, 2017 at 5:45 pmWe used glue and a nail gun to secure them – didn’t go by the studs. Worked for us, but if we ever decide to take it down, I think we’re going to have a mess on our hands! Thankfully, I still love it as much as I did when we installed it. 🙂
danielle
February 5, 2011 at 2:18 amI'm in the middle of doing this for my kids bathroom. How did you attach your boards to the wall if they are not in studs?
My Cottage Charm
February 19, 2011 at 9:41 pmWhat is the final height of your board and batton? I am contemplating doing this in a couple of places and like the taller version, but I'm unsure of the height. 🙂
Yours looks lovely!
thanks
Missy
Kathy
March 25, 2011 at 4:45 pmThis is SO good!
The Rustic Victorian
March 26, 2011 at 12:28 pmThis B&B is awesome, I have never heard of it before! Your home is beautiful!
♥
Marcie
Anonymous
May 20, 2011 at 4:00 amDid you use an eggshell or semi-gloss finish for the white paint? Also was it the same finish as the paint color above the board? I'm taking on this same project in my home and semi-gloss seems like a good idea for the ease of clean up. Thanks!
Anonymous
October 12, 2011 at 6:25 pmHi Jenny! I LOVE this board and batten in your hallway! Can you please give me the board sizes you used for the entire project? I am dying to do this in my hallway too! Thanks
Anonymous
October 24, 2011 at 12:41 amHi- Can you please tell me if you used 1×4 mdf boards on vertical and what size horizontal? I love the look and want to do this in the babys rrom due feb. and thought that I had to take off the baseboards and replace but I see you didnt and it looks amazing? I just want it to be perfect. Thanks a bunch. Erin.
Anonymous
October 25, 2011 at 2:06 amCan you share what the white/cream color is on the board and batten and on the molding on the bottom of room, is it the same color on the moding? semigloss?
Crystal @ Ordinary Days
December 28, 2011 at 3:35 amThis is gorgeous! I am wanting my husband to do board and batten in my hallway and then in my kitchen. Did you all just paint between the boards? Also, my husband was wondering if you know how he attached the boards to the baseboard. Thanks!
Anonymous
January 25, 2012 at 1:42 amLove this board and batten!!! can you please tell me the exact sizes of boards you used for the entire project? also, did you use a gloss paint? Thanks so much.
Karen @ THEBUZYBUG
February 1, 2012 at 8:35 amHi Jenny, love that space. It turned out beautiful! What paint color is that green in your home? I just love it!
Jenny
February 5, 2012 at 4:13 amThe green that was there when we did the board and batten is called Burlap by Sherwin Williams.
Karen @ THEBUZYBUG
February 1, 2012 at 8:35 amHi Jenny, love that space. It turned out beautiful! What paint color is that green in your home? I just love it!
Anonymous
February 5, 2012 at 3:38 amJenny, did you answer the questions privately? I have questions, but they have all been asked. My most important question is, where the rug came from?
Jenny
February 5, 2012 at 4:12 amSome questions I did answer privately (before I had the ability to reply here in the comments!). I got the rug from the Ballard Designs Outlet. Even though I have repainted since doing this project, I haven't yet found a new rug (and still love this one). It will eventually find a new home somewhere in the house. 🙂
Michelle
February 16, 2012 at 5:31 pmJust stumbled accross this post thanks to Pinterest… I was getting ready to do something like this and THIS is my new inspiration! Thank you!!!!!
Anonymous
February 25, 2012 at 12:49 amPlease could you answer the questions posted from Heather B. Thanks
Marianne
February 27, 2012 at 9:25 pmLooks beautiful.One question….if the vertical boards are only 12 inches apart, you wouldn't be able to hit studs with each one. did you use a liquid nails to attach them to the wall?
Cheryl
March 5, 2012 at 4:36 amI really like this Board & Batten. I really like the height & want this in our new home. Thanks for the pictures!
Diane
March 5, 2012 at 1:42 pmI have redone my entire house…except the hallway…couldn't figure out what I wanted to do with it. Now I know! Thanks so much for this!
Anonymous
May 5, 2012 at 3:17 amThis is so gorgeous. Can you tell please please please tell me where you got that rug?
Jenny
May 5, 2012 at 1:55 pmThe rug is from the Ballard Designs outlet store. It's a Safavieh brand rug though, and I just bought another (similar) one from Overstock.com.
Lynn @ UpCountry Olio
August 24, 2012 at 4:13 amI am digging back into your archives a bit but I just had to comment on your hallway treatment. It is beautiful! I love how it brightens up your hallway. Thanks for stopping by and commenting on my board and batten treatment. Looks like we both love the look.
I'm so happy to find your blog, there is just so much inspiration here! Can't wait until I have a bit more time to check it all out!
Lynn
Rachael
November 8, 2013 at 8:21 pmLove love love! I've done a ton of B&B in my house too, it makes such a difference. Great work! Would love to have you share on my weekend linky party http:/www.lovelycraftyhome.com
Levelhead
November 21, 2013 at 5:32 pmExactly what I was looking for. Bee-U-Ti-ful result. Thank you so much for including what paint shade and type you used! – so frustrating when this is not referenced.
Levelhead
November 21, 2013 at 5:34 pmExactly what I was looking for. Bee-U-Ti-ful result. Thank you so much for including what paint shade and type you used! – so frustrating when this is not referenced.
Marmot L.
January 13, 2014 at 4:32 amLove this wall treatment can you give an idea of the cost involved? Well done! It'sgorgeous!
Marmot L.
January 13, 2014 at 4:32 amLove this wall treatment can you give an idea of the cost involved? Well done! It'sgorgeous!
Linda Weeks
September 18, 2014 at 12:42 pmvery clever use of materials!
b74c17a8-5849-11e4-8326-9f10064c2068
October 20, 2014 at 11:10 amYou still loving that rug? I'd be happy to buy it from you if you tire of it. Can't find anything like it, and the colors are perfect for my space.
Michael Marshall
July 27, 2015 at 6:41 pmLooks great! Working on the same project now. Is there a width difference between your baseboards and your top horizontal board(7 1/2)? It looks like the top board is wider and I kind it so I'm going to try and keep it proportional but know the angles of the picture can affect perception.
Thanks!
Marcia Lakin
December 4, 2017 at 11:29 amHi Jenny! I have followed your blog for years and appreciate your talents so much! On this post the last photo of the hallway door is beautiful (board and batten photo project). It went from white to black to what I believe is your current door color, a grayish modern taupe???? Can you please tell me the color of the door? I believe the hallway walls are Revere Pewter. Yes, my all time fav color as well!! Thanks a bunch!
Kathy H
April 20, 2018 at 5:24 amAbsolutely love this. I have been been planning this in our home but didn’t get the chance. We have now bought another, and this is one of the first projects I want to complete! First in dining room, then in other rooms! We have Stickley furniture…what could be a better fit?i just can’t wat!
Tony M
October 28, 2018 at 10:29 amI really like this idea, and was thinking of putting a lip on the top trim so I can rest pictures on it. My head is spinning with ideas now !
Mari
March 29, 2019 at 3:11 pmMy husband is in the process of imstalling board and batten in our halfways and stairway. The paint he brought home is enamel satin. It shows every brushstroke. What paint type and finish do you recommend?
Jenny
April 1, 2019 at 5:30 pmI’m not sure what kind of paint it is, but perhaps you need to use a different mini roller for the board and batten. It varies, depending upon the paint you’re using, but when I used Benjamin Moore Advance, I had a lot of success with a mohair mini roller.
Kelli
July 15, 2020 at 8:48 amHi Jenny, it looks beautiful! What type of paint finish did you use? I’m doing something similar and in the past I’ve used semi-gloss but that was wainscoting below the chair rail and I wonder if semi-gloss would be too shiny so far up the wall. Yours looks great and I’d love to know what you used, thanks!
Jenny
July 23, 2020 at 4:13 pmI always opt for a satin finish – not too shiny, since that brings to light every flaw!
Melanie
April 12, 2021 at 1:33 amI love your finished space! I’d really love to know the color of the paint above the board and batten. It’s so light and airy!
Jenny
April 12, 2021 at 8:04 amThe latest version of the paint color on the walls is Revere Pewter – a Ben Moore color (one of my favorites).
Allison Hawks Walters
December 17, 2021 at 2:23 pmIt is beautiful. How about the color of your door? I love everything about this!!!!!
Jenny
December 18, 2021 at 3:34 pmThanks so much. I believe the last color we painted in this picture was Chelsea Gray (Ben Moore color).